
You're looking at the mirror a few days after laser tattoo removal, and the area still looks red, a little shiny, maybe even flaky. That can feel unsettling, especially if you expected the skin to look “back to normal” right away. Skin after tattoo removal heals in phases, and the visible change you see on the surface is only part of the story. The laser breaks tattoo pigment into tiny fragments, then your immune system and your skin's repair cycle do the rest over the following weeks.
For a plain-language explanation of how the laser breaks up ink in the first place, this complete breakdown for first-timers is a useful companion read. What follows here focuses on the part people worry about, the skin itself, from the first hour after treatment through the weeks when fading continues and cover-up planning becomes realistic.
Table of Contents
- Introduction to Skin After Tattoo Removal
- Healing Stages of Skin After Tattoo Removal
- Managing Short Term Skin Reactions
- Long Term Skin Changes and Risk Factors
- Evidence Based Aftercare for Treated Skin
- Preparing for Cover Ups and Future Sessions
- Conclusion and Next Steps
Introduction to Skin After Tattoo Removal
The first thing many people do after a session is inspect the area under bright bathroom lights and assume something is wrong. Redness, mild swelling, tenderness, and a little peeling can look dramatic, but they're usually part of normal recovery rather than a problem. The skin has just been treated in a controlled way, so it reacts like it has been stressed, not erased.
A helpful way to think about it is this, the laser session is the spark, but the visible healing is the cleanup crew. The skin can calm down in days, while pigment clearance keeps moving in the background for much longer. That gap is why people often feel confused, they see the surface change first and assume the treatment result should be finished at the same time.
Practical rule: judge healing by the trend, not one mirror check. If the area is becoming less angry day by day, that usually fits normal recovery.
The next sections walk through the timeline step by step, starting with the immediate reaction, then the short-term symptoms, the longer-term risks, and the aftercare habits that support better fading. The goal is to make the process feel predictable, because tattoo removal is easier to handle when you know which changes are expected and which ones deserve attention.
Healing Stages of Skin After Tattoo Removal
Stage 1 Immediate response
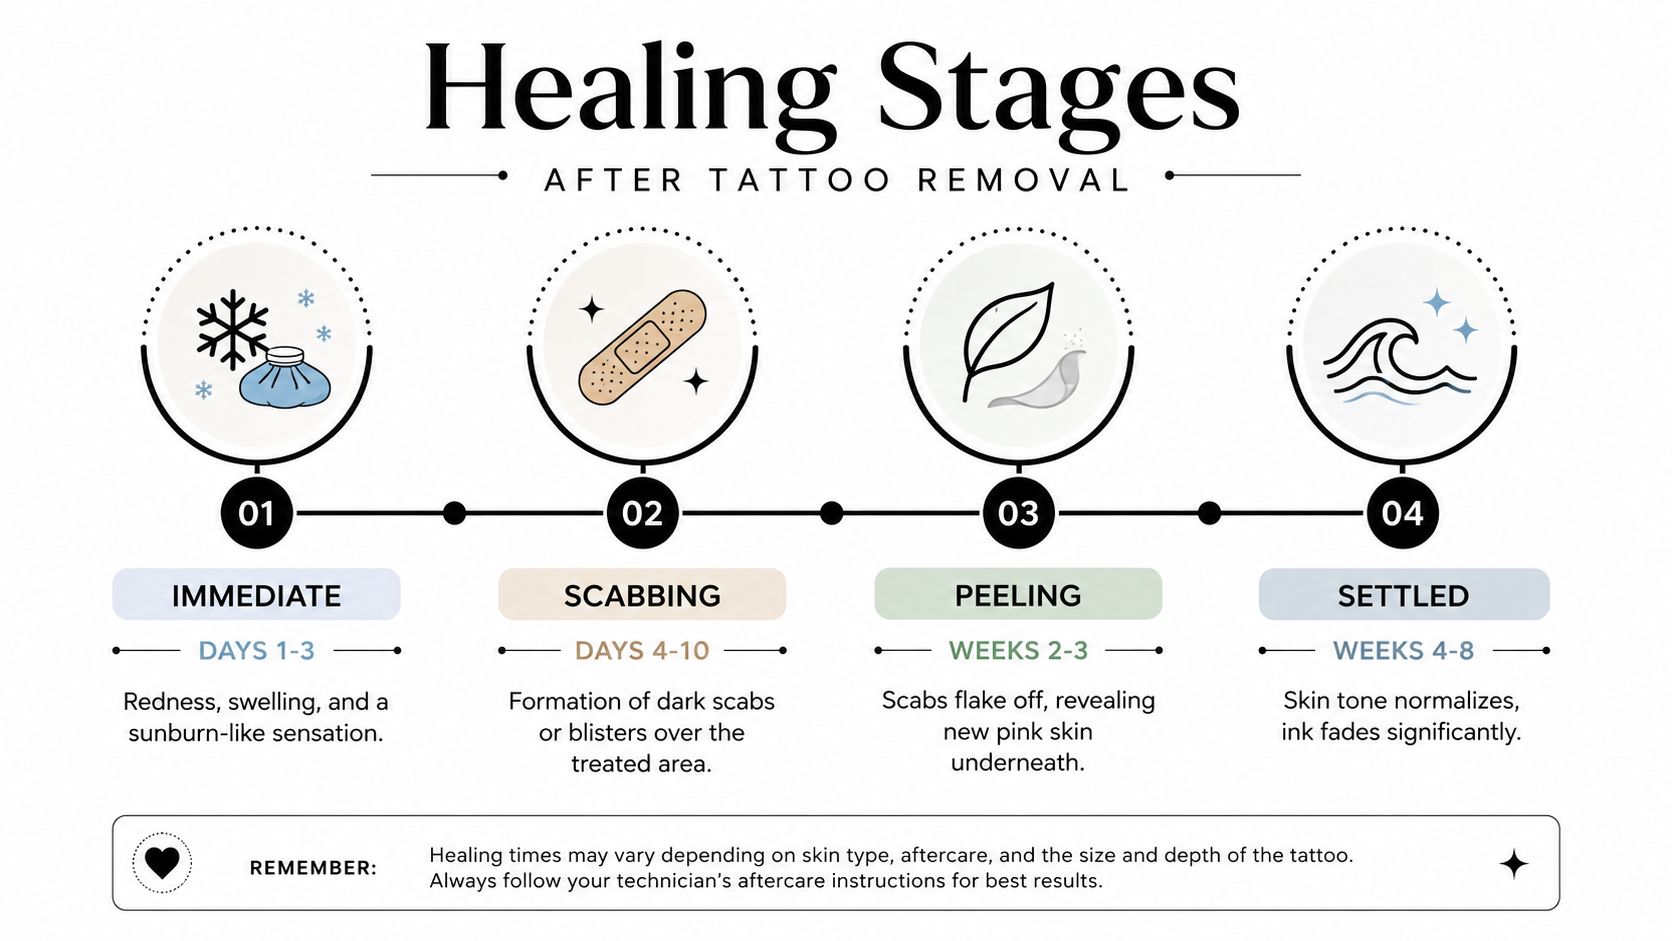
Right after treatment, the skin often turns white or “frosted,” then follows with swelling, redness, and tenderness. That pale flash can look surprising, but it is a known reaction when laser energy hits tattoo pigment and briefly heats the surrounding tissue. The U.S. National Library of Medicine notes that edema, erythema, and pruritus commonly appear within the first 24 hours and usually settle within 1 to 2 weeks (U.S. National Library of Medicine).
A simple way to understand this phase is to separate what you see on the surface from what is happening underneath. The top layer reacts quickly, while the immune system starts clearing fragmented ink over the following weeks to months between sessions (clinical review). That is why the tattoo can look different from one day to the next, even though pigment fading continues at a slower pace.
Stage 2 Early settling
During the next several days, redness and tenderness should begin to calm. The skin may still feel tight, warm, or itchy, and some people notice light crusting or scab formation. Those changes usually mean the body is building a temporary barrier while new skin settles underneath.
Recovery plans often space sessions 6 to 8 weeks apart so the epidermis and dermis have time to recover before the next pass (clinical review). The surface may look nearly settled before that interval ends, but deeper repair and ink clearance are still happening. That difference matters, because “looks calmer” is not the same as “ready for another treatment.”
The surface calms first, the pigment clears later.
If the area feels unusually hot, spreads beyond the treated zone, or starts draining, a signs of infection after tattoo removal check is worth doing rather than guessing. For readers who want a better sense of comfort options, the guide to topical analgesics in Canada can also help explain which pain-relief approaches belong before treatment, not on healing skin.
Stage 3 Surface renewal
As the outer layer renews, scabs flake off and fresh skin can look pink or slightly uneven in tone. That does not automatically mean damage. New skin often stays more delicate for a while, much like a fresh scratch that has closed but not fully blended back in.
This phase matters because the skin is easier to irritate while it is rebuilding. Friction, heat, and picking can turn a normal healing process into a longer one. The safest approach is to let the skin release dead material on its own and keep the area calm while it finishes repairing.
Stage 4 Settled healing
By the time the area has fully calmed, the skin tone usually looks more even and the tattoo should appear lighter than it did before the session. Full skin healing commonly takes about 4 to 6 weeks (clinical recovery source). That does not mean every bit of ink is gone, only that the visible wound response has finished and the next session can be planned with clearer skin.
This final stage is where the process starts to feel more predictable. The skin recovers in layers, and fading follows its own slower rhythm. That is normal, and it is also why tattoo removal is usually scheduled as a series rather than one dramatic event.
Managing Short Term Skin Reactions
What redness and swelling mean
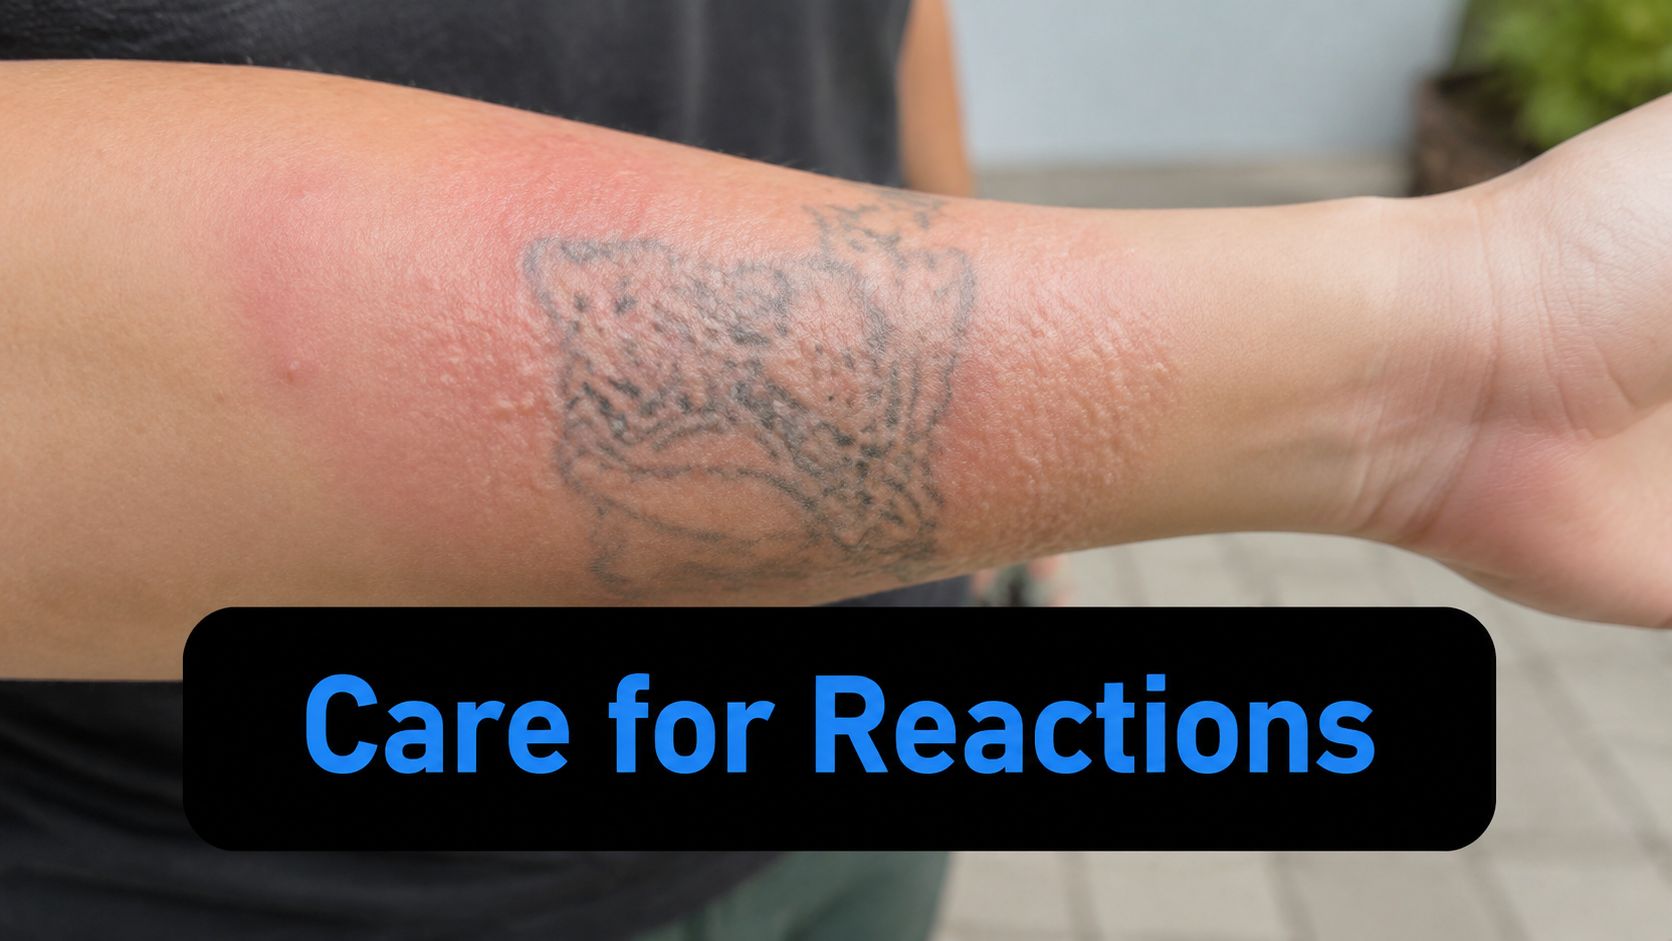
Redness and swelling are the most common short-term reactions, and they usually feel a lot like an intense sunburn. The area may be warm, tender, or itchy, especially during the first day or two. That sensation comes from controlled tissue stress, not necessarily from a complication.
A simple way to respond is to reduce irritation instead of trying to “push through” it. Loose clothing helps, because friction can make the skin angrier than it already is. A cool compress wrapped in cloth can also make the area more comfortable without shocking the skin.
How to handle blisters and scabs
Blisters and scabs can look alarming, but they're part of the expected healing pattern for many people. The key is to let them do their job. One recovery source states that scabbing and blistering should not be picked, peeled, or popped because that raises the risk of infection and scarring (aftercare guidance).
That advice matters because a blister is basically a natural bandage. If it stays intact, the skin underneath has a better chance to rebuild without extra contamination or trauma. If a blister opens on its own, keep the area clean and don't scrub at the loose skin.
Practical rule: if it's attached, leave it alone. If it falls away naturally, that's fine.
If you're trying to manage soreness without irritating the area, a guide to topical analgesics in Canada can help you compare non-prescription options and understand what belongs on healing skin and what doesn't. Just make sure any product is used only as directed and only if your provider says it's appropriate for your stage of healing.
For a closer look at warning signs that deserve medical attention, see this signs of infection after tattoo removal resource. Redness that steadily improves is one thing, but redness that spreads, thick discharge, or worsening pain is a different pattern entirely.
What to avoid while the skin is fragile
Soaking the area is a bad idea until the skin is fully healed. That means no baths, hot tubs, swimming pools, or open water while the surface is open or crusted, because submerging healing skin increases the chance of irritation and infection (aftercare guidance). Sweat, tight waistbands, and rough fabric can also keep the area inflamed longer than it needs to be.
Keep the instinct to “help” the area in check. Most short-term healing problems come from overhandling, not from the laser itself.
Long Term Skin Changes and Risk Factors
A tattoo removal session can look calm on the surface and still leave the skin adjusting underneath. Some people finish healing with no visible lasting change, while others notice post-inflammatory pigmentary change or, less commonly, scarring. The difference usually comes down to the tattoo itself, the skin being treated, and how carefully aftercare is followed.
Skin healing here works a bit like a field after repeated tilling. One pass does not decide the final result, but repeated passes, poor timing, or extra stress can leave the surface uneven. That is why long-term planning matters, especially if you want a cleaner result for a future cover-up or a later removal session.
What affects the final look
Expert reviews and clinical summaries report that tattoo removal usually takes multiple sessions, with a commonly cited average of 7 to 10 treatments, and some cases needing 4 to 15 sessions or more depending on ink density, color complexity, age, location, and individual skin response (review summary). Those repeated treatments give the body time to clear fragmented pigment, but they also mean the skin needs room to recover between sessions. If the area gets irritated, picked, or exposed to too much sun, the chance of pigmentary change goes up.
The broad pattern is straightforward. Darker, amateur tattoos often clear more readily than complex professional work, because dense multicolor designs can be harder to break down evenly. Tattoos on areas with weaker circulation can also take longer to fade, since the body clears fragmented pigment through its own immune and lymphatic processes.
Risk factors and likely changes
| Risk Factor | Potential Change | Mitigation Tip |
|---|---|---|
| Dense ink load | Slower fading between sessions | Keep treatment spacing consistent |
| Multicolor design | Uneven clearance across colors | Ask about wavelength matching |
| Older placement depth | More sessions may be needed | Plan for progressive treatment |
| Poor aftercare | Pigmentary change or scarring | Avoid picking and friction |
| Sun exposure | Darkening or lightening of healing skin | Protect the area from UV |
A practical way to think about this is session by session. Each appointment is one stage in a longer process, not a final verdict on the skin. That mindset makes it easier to plan for progressive fading, a future cover-up, or full removal without expecting the skin to settle all at once.
If you want a closer look at how scar concerns are discussed after laser work, this laser tattoo removal scars resource is useful. It helps separate normal texture changes from patterns that deserve professional review.
If you are also comparing longer-term skin recovery after other cosmetic procedures, this guide to CO2 laser resurfacing costs for can help frame how recovery planning is discussed in related treatments. The procedure is different, but the idea is the same, the way skin heals affects the final result.
Evidence Based Aftercare for Treated Skin
Protect the area from the sun
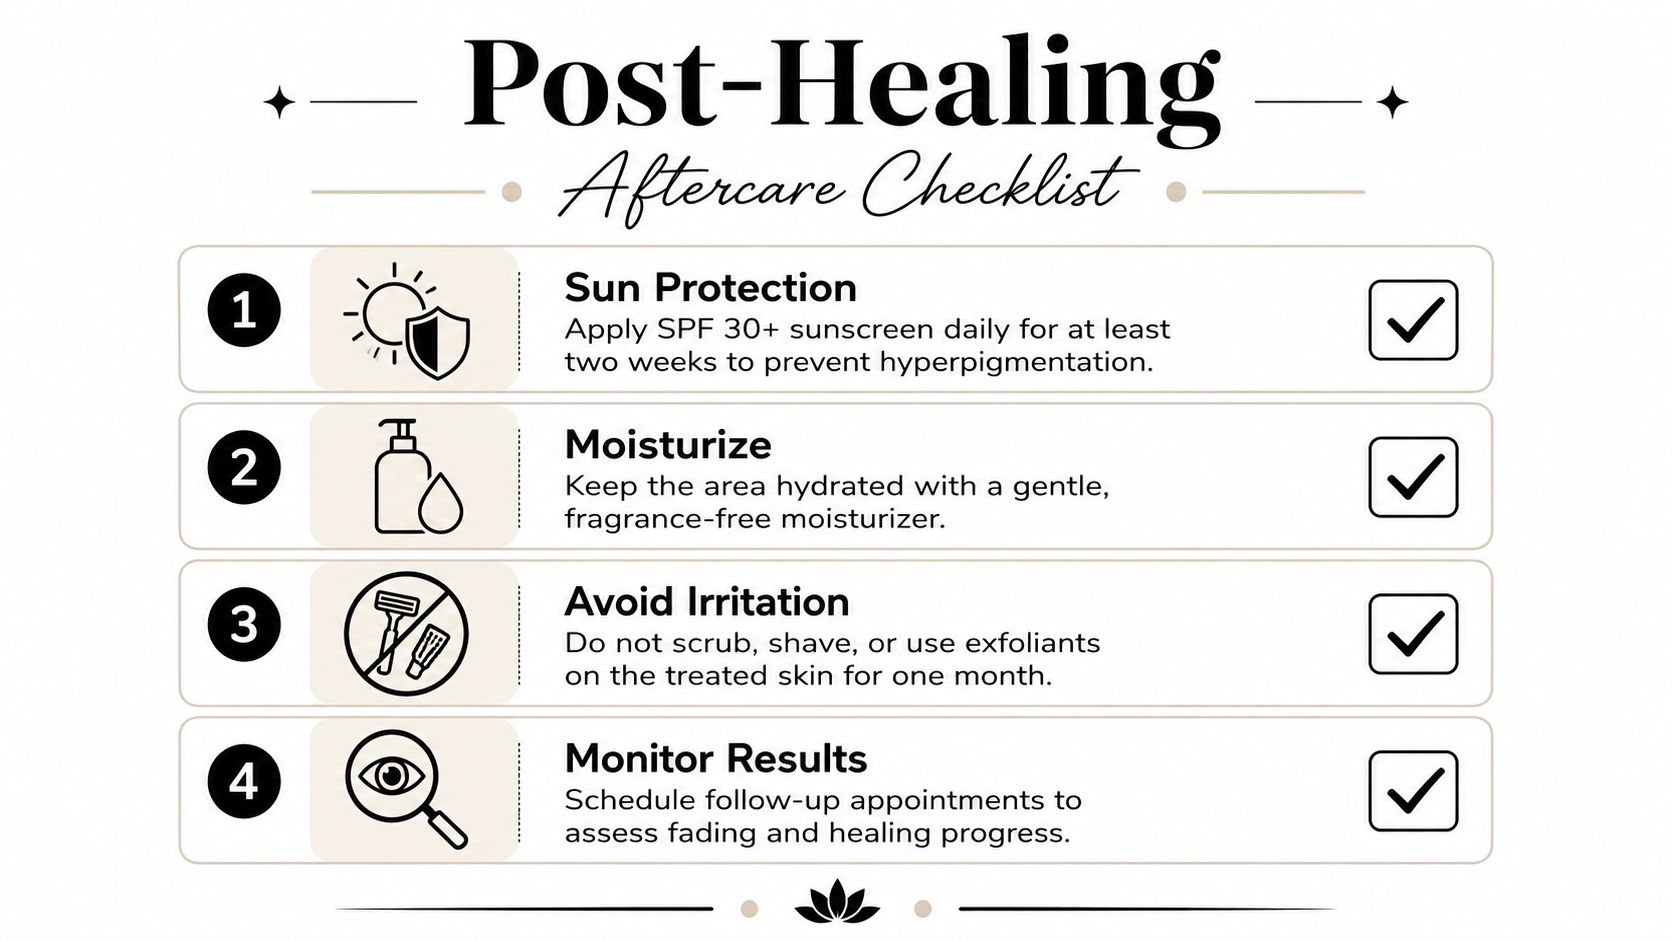
Sun protection is one of the clearest ways to protect healing skin. Keep the treated area out of direct sun for the first 2 weeks and avoid deliberate tanning during the treatment course (clinical recovery source). Once the skin is closed and no longer open or scabbed, broad-spectrum mineral sunscreen is the safer next step.
UV exposure can push healing skin toward uneven pigmentation, the same way a fresh paint job can still change color if it is left out in harsh weather. If you want the next session to have a cleaner result, the current one has to heal without extra color change from the sun.
Keep the skin clean and low stress
Keep the treated area clean and dry for the first day, avoid tight clothing, and use a thin layer of hydrocortisone cream for the first five days (clinical recovery source). Those steps are plain, but they lower friction and give the skin room to settle without extra irritation.
A good routine is deliberately simple. Gentle cleansing, clean hands, loose fabric, and no scratching support the repair process while the skin is still sensitive. If the area stings or feels hot, that is a sign to ease back on anything that rubs or traps heat.
Respect the recovery window
Recovery is not only about comfort. Full skin healing commonly takes 4 to 6 weeks (clinical recovery source), which is why the skin should not be rushed back into harsh activity. The area also should not be submerged in baths, pools, or open water until it is fully healed, and scabs or blisters should never be picked or popped (aftercare guidance).
Healing often moves in stages, much like a bruise changing color before it fades. Redness, flaking, and mild tenderness can all sit within a normal recovery pattern, while rising pain, spreading redness, or drainage deserve professional review. For people planning a cover-up later, that slower settling period matters because an artist needs skin that looks calm, not just skin that no longer feels sore.
If you are choosing between treatment providers or trying to understand how aftercare fits into a care plan, EradiTatt Tattoo Removal offers progressive laser sessions and practical post-treatment guidance, which makes the recovery period easier to manage.
Preparing for Cover Ups and Future Sessions
If your goal is a cover-up rather than full removal, the skin needs to be more predictable before the next design goes on top. Fading happens in stages, so the smartest move is to wait for the tone to settle and the ink to lighten enough for an artist to assess what can realistically be built over. That evaluation is easier when the area has already gone through a full recovery cycle.
The U.S. National Library of Medicine notes that laser tattoo removal is typically repeated every 6 to 8 weeks, with total treatment often taking 4 to 15 sessions depending on tattoo age, color, quality, and placement (U.S. National Library of Medicine). That spacing gives the skin time to recover and gives the body time to continue clearing fragmented pigment before the next session.
A simple planning checklist helps here:
- Track fading. Take photos in the same light so you can compare sessions without guessing.
- Wait for calm skin. Don't judge cover-up readiness while the area is still red or flaky.
- Match expectations to the ink. Dense or multicolor tattoos usually need more rounds before a new design can sit cleanly on top.
- Talk about the end goal early. A technician or artist can tell you whether you're chasing total clearance or just enough fade for a smarter cover-up.
When people rush this part, they often end up with a cover-up that looks cramped or dark. When they wait for proper healing, the next design has a better canvas and the removal process feels more deliberate.
Conclusion and Next Steps
Skin after tattoo removal usually calms in phases, not all at once. The surface reaction comes first, the deeper cleanup follows later, and the safest results come from giving the skin time, avoiding irritation, and protecting it from sun and picking. If you remember only one thing, make it this, progressive fading is normal and good aftercare helps the next session do better work.
If you're planning removal or fading for a cover-up, the next smart move is a personalized consultation with a provider who can assess your skin, your tattoo, and your recovery pattern. That's the best way to choose the right spacing, aftercare routine, and end goal.
EradiTatt Tattoo Removal helps clients plan progressive laser sessions for complete removal or cover-up prep, with guidance that matches skin recovery and fading goals. If you're ready to take the next step, visit EradiTatt Tattoo Removal to explore consultation options and start a treatment plan that fits your skin and your timeline.
5 Responses