
You've just finished a laser tattoo removal session, and the treated area feels hot, tight, and unexpectedly tender. The tattoo may look frosted white, swollen, or more irritated than you expected. That appearance can be alarming, but the skin is showing a treatment response, not necessarily a problem. Laser removal aftercare differs from new-tattoo care because the laser has disrupted ink beneath the skin and your immune system now has to clear those fragments.
The right routine protects the skin barrier while allowing that natural clearance process to continue. Clean gently, control moisture, avoid friction and ultraviolet exposure, and know which changes need medical attention.
Table of Contents
- Understanding Your Skin Right After Treatment
- Daily Cleaning and Moisturizing Routine
- Products to Use and Habits to Avoid
- The Week by Week Healing Timeline
- Recognizing Normal Reactions Versus Infection
- Your Quick Reference Aftercare Checklist
Understanding Your Skin Right After Treatment
A client may leave a treatment room expecting the tattoo to look lighter immediately. Instead, the area can feel like a mild sunburn, with warmth, tingling, redness, and localized swelling. Those sensations usually reflect the skin's immediate response to the laser. The treated surface may also develop frosting, a temporary white or pale appearance created when the laser interacts with ink particles and produces tiny gas bubbles in the skin.
Frosting can make a dark tattoo look suddenly chalky. It commonly fades within thirty minutes, as documented in clinical discussion of laser tattoo removal reactions (PubMed). The tattoo may then appear red, puffy, or slightly darker. None of those changes should be judged as the final result while the tissue is still reacting.
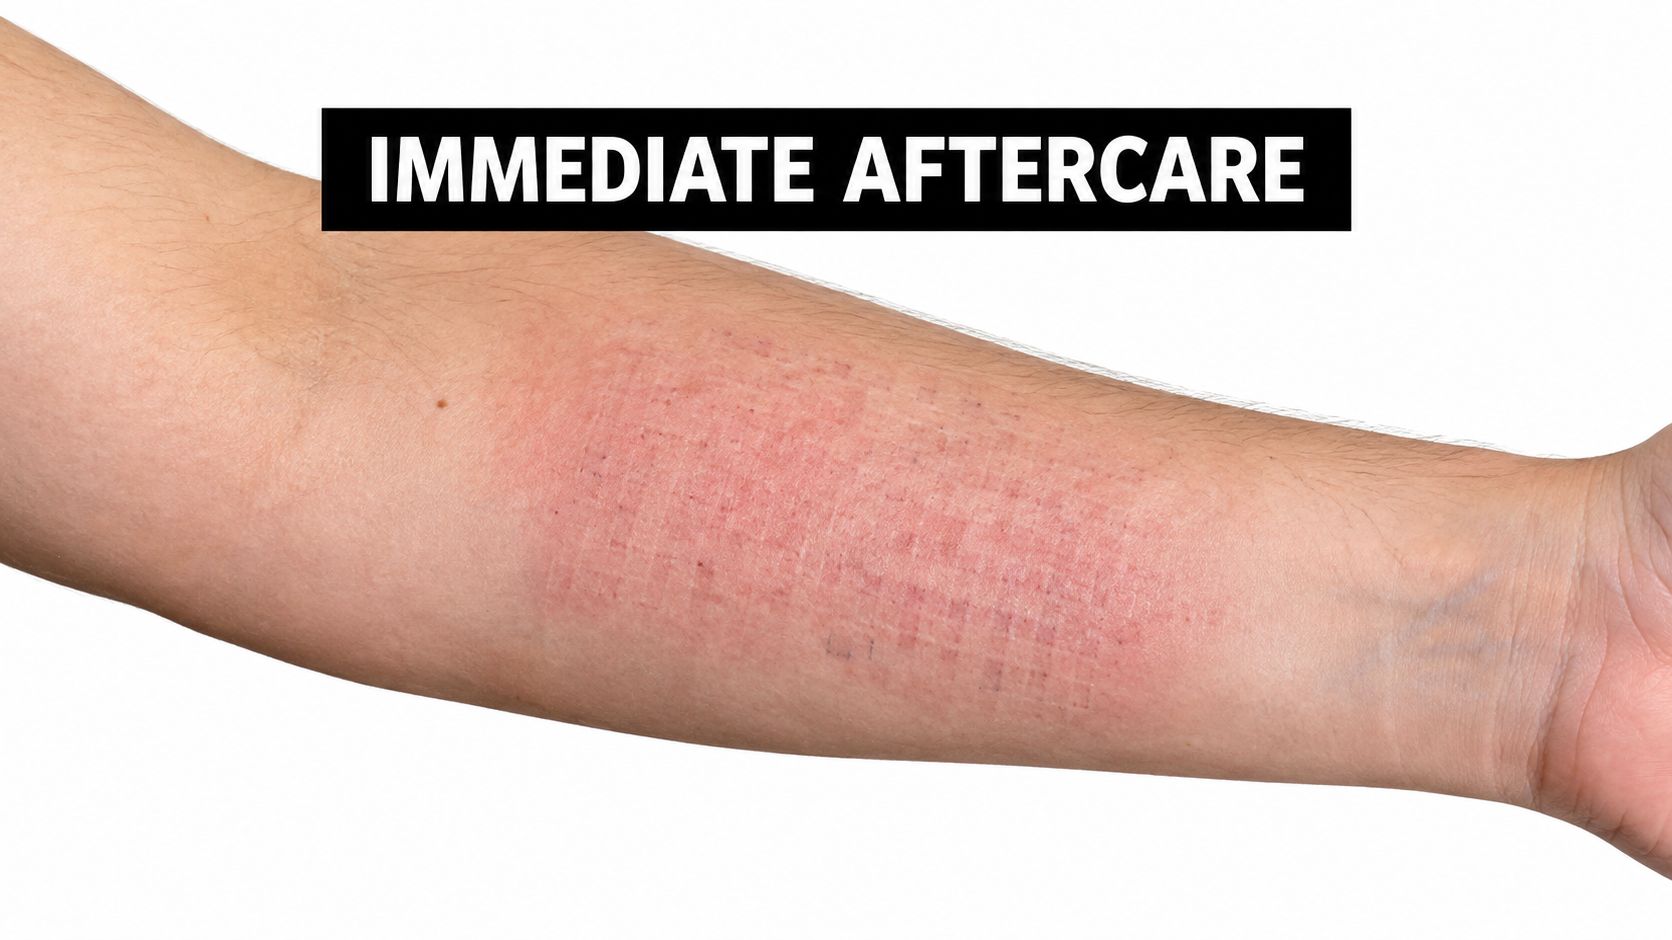
What frosting and micro-blisters mean
Small, clear micro-blisters may form later, sometimes alongside pinpoint bleeding, crusting, or mild tenderness. The blisters are a reason to handle the area carefully, not a reason to drain or peel it. The surface needs time to close while immune cells begin transporting fragmented pigment away from the treatment zone.
Practical rule: Treat the area like delicate healing skin. Don't rub, scratch, puncture, or test the treated surface.
Keep the dressing, if your practitioner applied one, according to the clinic's specific advice. Loose clothing can reduce friction, particularly when the treatment sits beneath a waistband, sleeve, or bra strap. Increasing pain, spreading heat, or worsening redness is different from a stable, localized reaction and belongs in the warning-sign category later in this guide.
Daily Cleaning and Moisturizing Routine
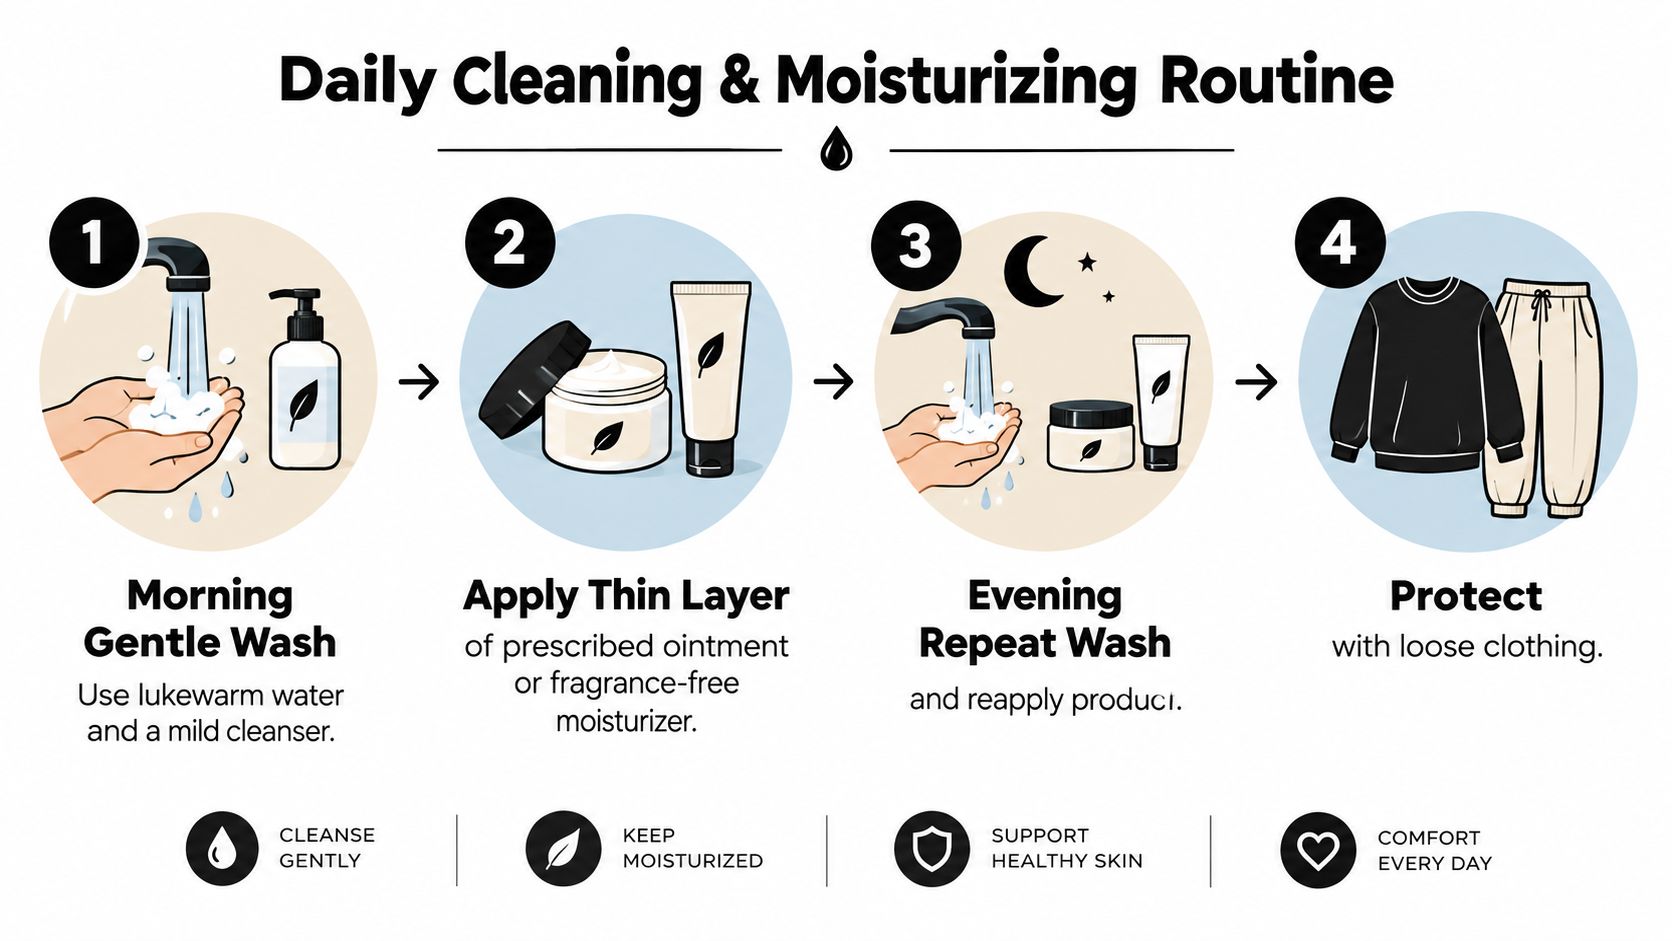
Laser-treated skin needs gentle cleaning, not aggressive scrubbing. Wash the area twice a day with lukewarm water and mild, fragrance-free soap. Use clean hands and minimal pressure. Let water run over the skin instead of aiming a strong shower stream at it. Direct pressure can rupture micro-blisters and further irritate tissue. These principles align with Mayo Clinic's tattoo-care guidance.
After rinsing, pat the area dry with a clean towel or disposable paper towel. Do not drag fabric across the treatment site. Rubbing can lift forming crusts, reopen fragile spots, and make inflammation appear worse.
Moisture needs timing and restraint
Do not moisturize while the area is actively weeping. Wait 24 to 48 hours, then apply a thin layer of a mild, fragrance-free moisturizer, unless your removal provider gives different instructions. General aftercare tips from Hawaii's top studio offer useful skin-care context, but laser-specific advice from your provider takes priority.
Use only enough product to ease tightness. A glossy coating indicates excess. Too much moisture can keep the surface wet, soften crusts, and interfere with closure. Too little can leave the skin uncomfortably dry and prone to cracking.
Keep the routine consistent. Wash gently in the morning, pat dry, apply a thin layer once the waiting period has passed, and repeat in the evening. If the treated area starts weeping again, pause moisturizer and contact your provider for guidance.
Products to Use and Habits to Avoid
After laser treatment, the simplest products usually create the fewest problems. Use a fragrance-free cleanser for surface residue, then a light, fragrance-free moisturizer only after the treated skin stops weeping. A cool compress over clean fabric or a suitable barrier can reduce heat and tenderness without rubbing the area.
Be cautious with heavy ointments. Thick petroleum-based layers can trap heat and moisture over blisters or crusts. Avoid harsh antiseptics, exfoliating acids, scented lotions, and abrasive scrubs while the barrier repairs. Published aftercare instructions vary on antiseptic and antibiotic soaps, and only 14.9% of analyzed instructions recommended topical antibiotics (PubMed). Follow your removal provider's product instructions, particularly if frosting, micro-blistering, or crusting develops.
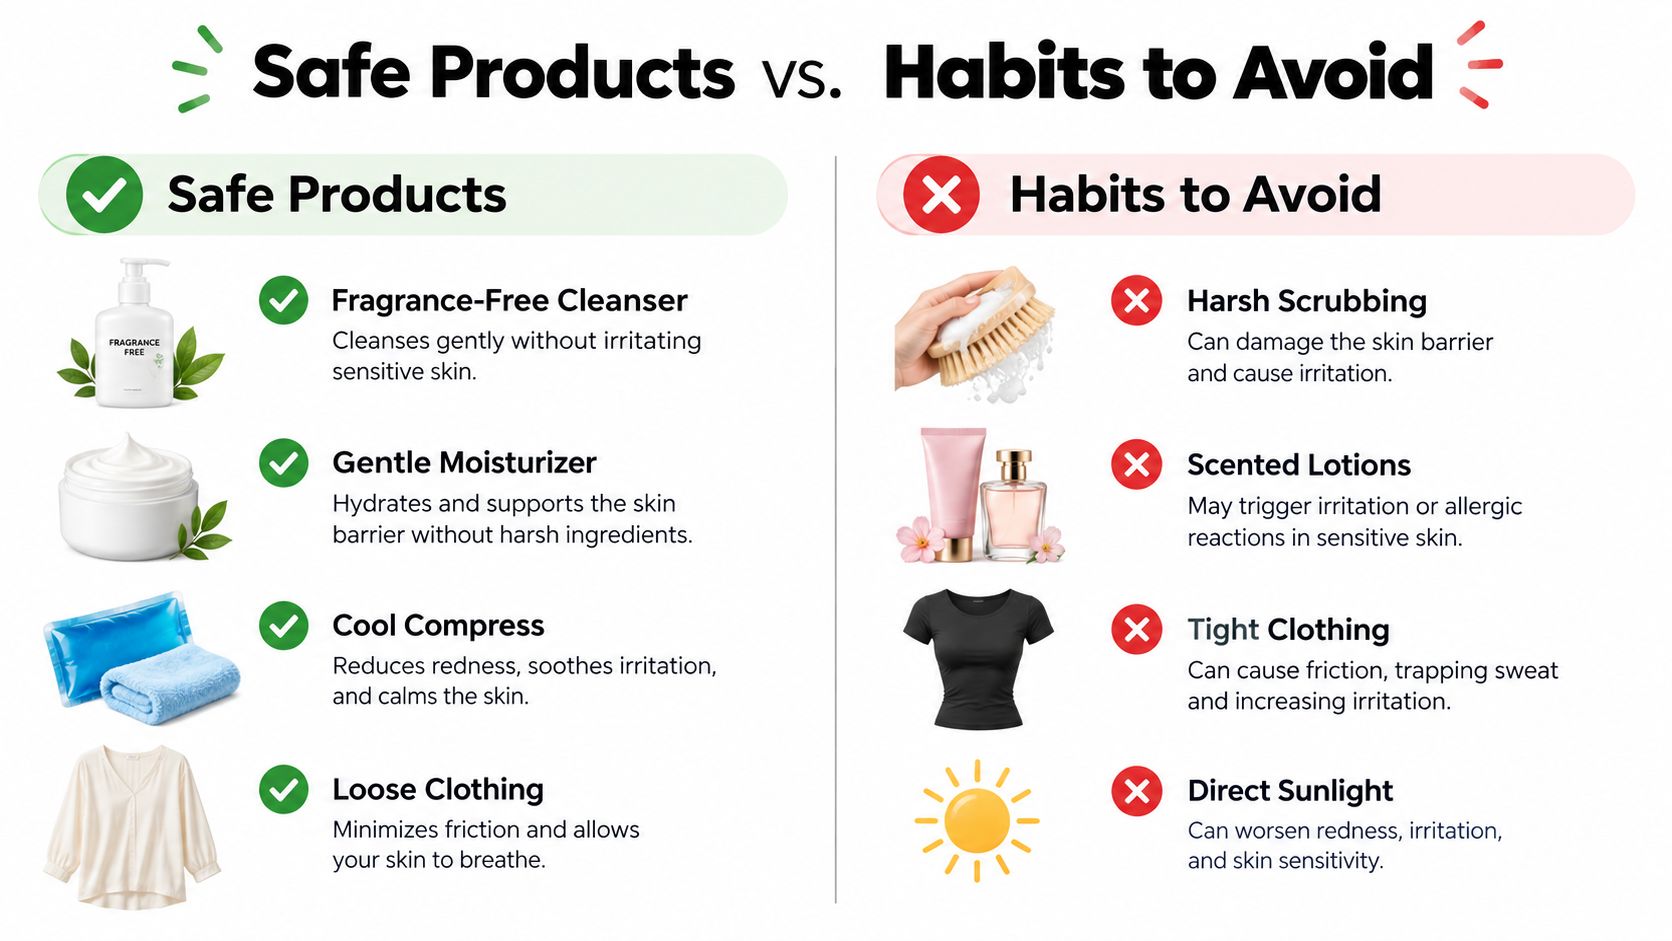
Match the habit to the healing risk
- Choose loose clothing: Soft, breathable fabric limits rubbing and allows heat to escape.
- Avoid tight coverage: Compression can catch on crusts, irritate blisters, and delay comfortable healing.
- Use shade and fabric: Ultraviolet exposure can worsen irritation and contribute to pigment changes. Cover the area while it heals.
- Skip immersion: Avoid swimming pools, hot tubs, baths, and open water while the surface is blistered, crusted, or otherwise open. Prolonged moisture and contamination can interfere with recovery. Follow the timing given by your provider.
- Pause sweat-heavy exercise: Intense workouts add heat, sweat, rubbing, and contact with shared equipment. Wait until active blistering or weeping has settled, then resume gradually. General aftercare guidance also supports limiting these exposures (Cleveland Clinic).
Laser aftercare differs from new-tattoo care because the immune system must flush fragmented pigment after the surface closes. Do not pick peeling skin or puncture blisters. For concerns about texture changes or laser tattoo removal scars, contact your provider before adding a product.
The Week by Week Healing Timeline
Laser tattoo removal recovery follows a sequence, even though each client's skin reacts differently. Early changes come from inflammation and surface repair. Later, immune cells continue clearing fragmented pigment beneath the healed surface. Frosting, swelling, crusting, or a temporarily darker tattoo can make the design look stronger before fading becomes easier to assess.
Early recovery
During weeks one and two, localized redness, swelling, tenderness, frosting, and small blisters are common treatment responses. Some treated areas crust while the surface repairs itself. Keep the area clean between washes, and allow blisters and crusts to resolve without interference. Picking or puncturing them exposes vulnerable tissue and can increase the risk of uneven pigment or scarring.
During weeks three and four, peeling and crusting should begin to settle. The skin may still look uneven in tone or texture, and itching can continue as repair progresses. Avoid scratching and continue protecting the treated area from direct sunlight. Healing can appear incomplete while the immune system is still processing disrupted ink.
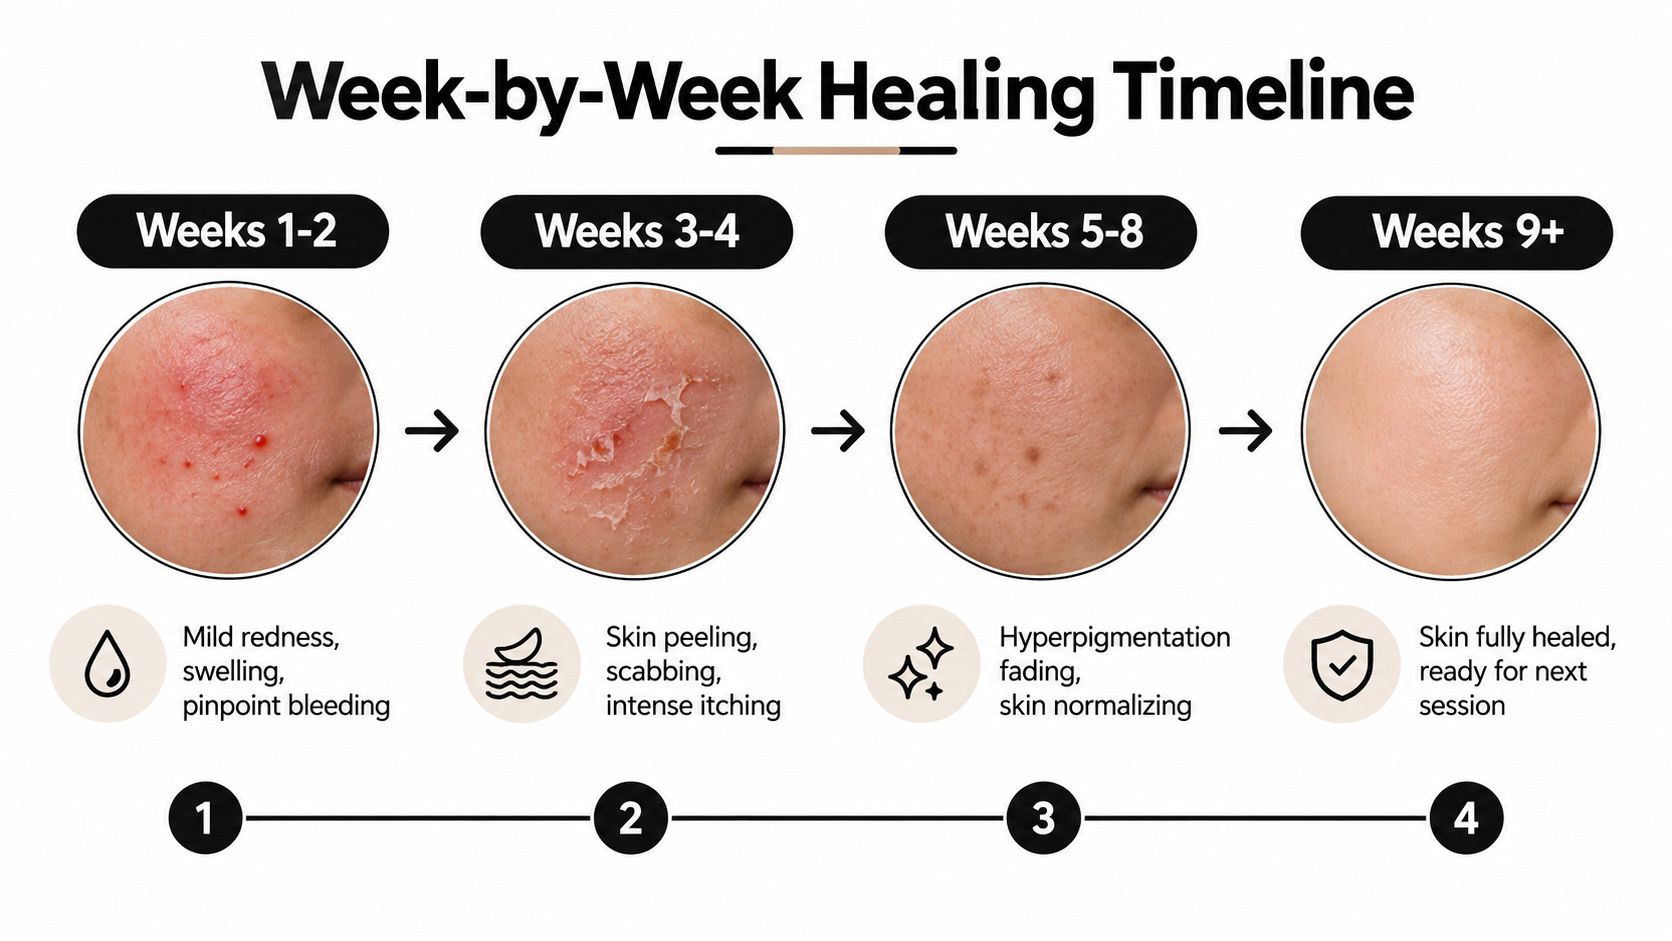
Later fading and session planning
By weeks five through eight, temporary color changes, including hyperpigmentation, may gradually soften, and the surface should feel closer to normal. Pigment clearance continues after visible blistering and crusting have ended, so judging the result too early can create unrealistic expectations. A staged recovery pattern is also described in this RF microneedling recovery timeline, although laser tattoo removal has its own tissue response and timing.
Sessions are commonly spaced six to eight weeks apart so the skin can recover and the body can continue processing fragmented pigment. Treating too soon can add trauma to skin that remains stressed beneath the surface. Before scheduling again, your provider should assess healing, texture, color response, and any reaction that has not settled.
For a closer look at expected changes, see this guide to skin after tattoo removal. Surface recovery and pigment fading do not always progress at the same speed. Allow the skin's appearance and feel to stabilize before evaluating the session or planning the next one.
Recognizing Normal Reactions Versus Infection
Laser treatment can leave the area warm, red, swollen, tender, or itchy. Small, clear blisters and a tight feeling are also common. Frosting may appear immediately, followed by temporary darkening, uneven color, or crusting as the fragmented ink and surface skin change. These effects should stay within the treated zone and gradually ease.
Infection follows a different pattern. Redness spreads beyond the treatment area, heat increases, pain intensifies, or drainage becomes thick and pus-like. Fever, chills, or feeling unwell suggest a wider response and require prompt medical attention.
Use a change-based test
Check whether the skin is stable, improving, or deteriorating. Mild tenderness, localized redness, and small clear blisters can fit expected recovery. Worsening pain, expanding redness, increasing heat, foul-smelling drainage, or red streaks do not.
Contact your removal provider if the reaction is difficult to interpret, particularly when blistering or crusting is more extensive than expected. Seek medical assessment promptly if symptoms are progressing rather than settling. Your practitioner can explain the expected laser response, including frosting, micro-blistering, and the gradual immune flushing of pigment, but a healthcare professional must diagnose infection and prescribe treatment.
Allergic and inflammatory tattoo reactions may persist beyond the first healing phase. A review describes tattoo-related inflammation, infection, scarring, and other longer-term complications. In a general tattooed population, an analysis of 308 reported cases found allergic reactions to red pigment represented 50.2%, while chronic inflammatory reactions to black pigment represented 18.2%. These figures describe reported tattoo complications broadly, not outcomes from laser tattoo removal or a diagnosis of your treated skin. Persistent itching, raised texture, redness, or changes linked to a particular ink color still merit review. (PubMed)
Do not wait for a routine appointment if the skin is deteriorating quickly. Contact a healthcare professional, and ask your removal provider for treatment-specific guidance.
General information about signs of MRSA for caregivers can help you recognize concerning patterns, but it cannot replace medical assessment. For more specific warning signs, review these signs of infection after tattoo removal.
Your Quick Reference Aftercare Checklist
Keep this list available during the recovery period. The most effective tattoo aftercare instructions are consistent rather than complicated. Your skin needs protection from contamination, friction, excess moisture, and sunlight while the immune system handles the fragmented ink.
Daily care
- Wash gently: Clean the treated area with mild, fragrance-free soap and lukewarm water twice a day.
- Control water pressure: Keep direct shower streams away from the treatment site.
- Pat dry: Use a clean towel or disposable paper towel without rubbing.
- Moisturize at the right time: Wait until initial weeping has stopped, then apply only a thin layer of the recommended product.
- Keep clothing loose: Prevent waistbands, sleeves, and straps from rubbing the area.
- Use cool comfort: Apply a cool compress gently if the skin feels hot or itchy.
Avoid during recovery
- Don't scratch or pick: Leave peeling skin, scabs, and blisters intact.
- Don't soak: Avoid pools, hot tubs, baths, and other immersion until your provider confirms the skin has healed.
- Don't exercise through irritation: Pause activities that create heavy sweat, heat, or friction.
- Don't expose healing skin to direct sun: Use loose clothing and shade rather than sunscreen on open or actively healing areas.
- Don't self-treat a worsening reaction: Escalating pain, spreading redness, pus, excessive heat, or fever needs medical advice.
Save photos in consistent lighting if your provider asks you to monitor progress, but don't use photographs as a substitute for an examination. If you're considering complete removal or fading for a cover-up, EradiTatt Tattoo Removal provides progressive laser treatment plans and post-treatment guidance adapted to factors such as skin type, tattoo size, color complexity, and lifestyle goals.
EradiTatt Tattoo Removal offers laser tattoo removal across convenient Florida locations, including Orlando, Bradenton/Sarasota, St. Petersburg, Palm Harbor, and Tampa. Visit EradiTatt Tattoo Removal to arrange a consultation, discuss your recovery needs, and plan the next safe step toward complete removal or cover-up fading.