
You've just left a tattoo removal appointment, and the treated area looks whiter, redder, or more swollen than you expected. Or perhaps your session is booked and you're wondering whether you'll need to change your routine. Knowing how to care for tattoo removal means looking beyond the first bandage. The skin moves through several distinct healing stages, and each stage needs a slightly different response.
Laser removal creates a controlled injury that breaks tattoo pigment into smaller fragments for your body to clear gradually. Aftercare is a staged commitment, not a one-day task. The most important priorities are gentle cleaning, moisture, friction control, heat avoidance, and consistent protection from ultraviolet exposure.
Table of Contents
- What to Expect Before and After Your Removal Sessions
- Preparing Your Skin in the Weeks Before Treatment
- The First 48 Hours After a Removal Session
- Caring for Your Skin During the Two-Week Healing Window
- Delayed Pigment Changes Most Guides Miss
- Adjusting Care for Full Removal, Fading, and Different Skin Tones
- Your Final Aftercare Checklist and When to Call
What to Expect Before and After Your Removal Sessions
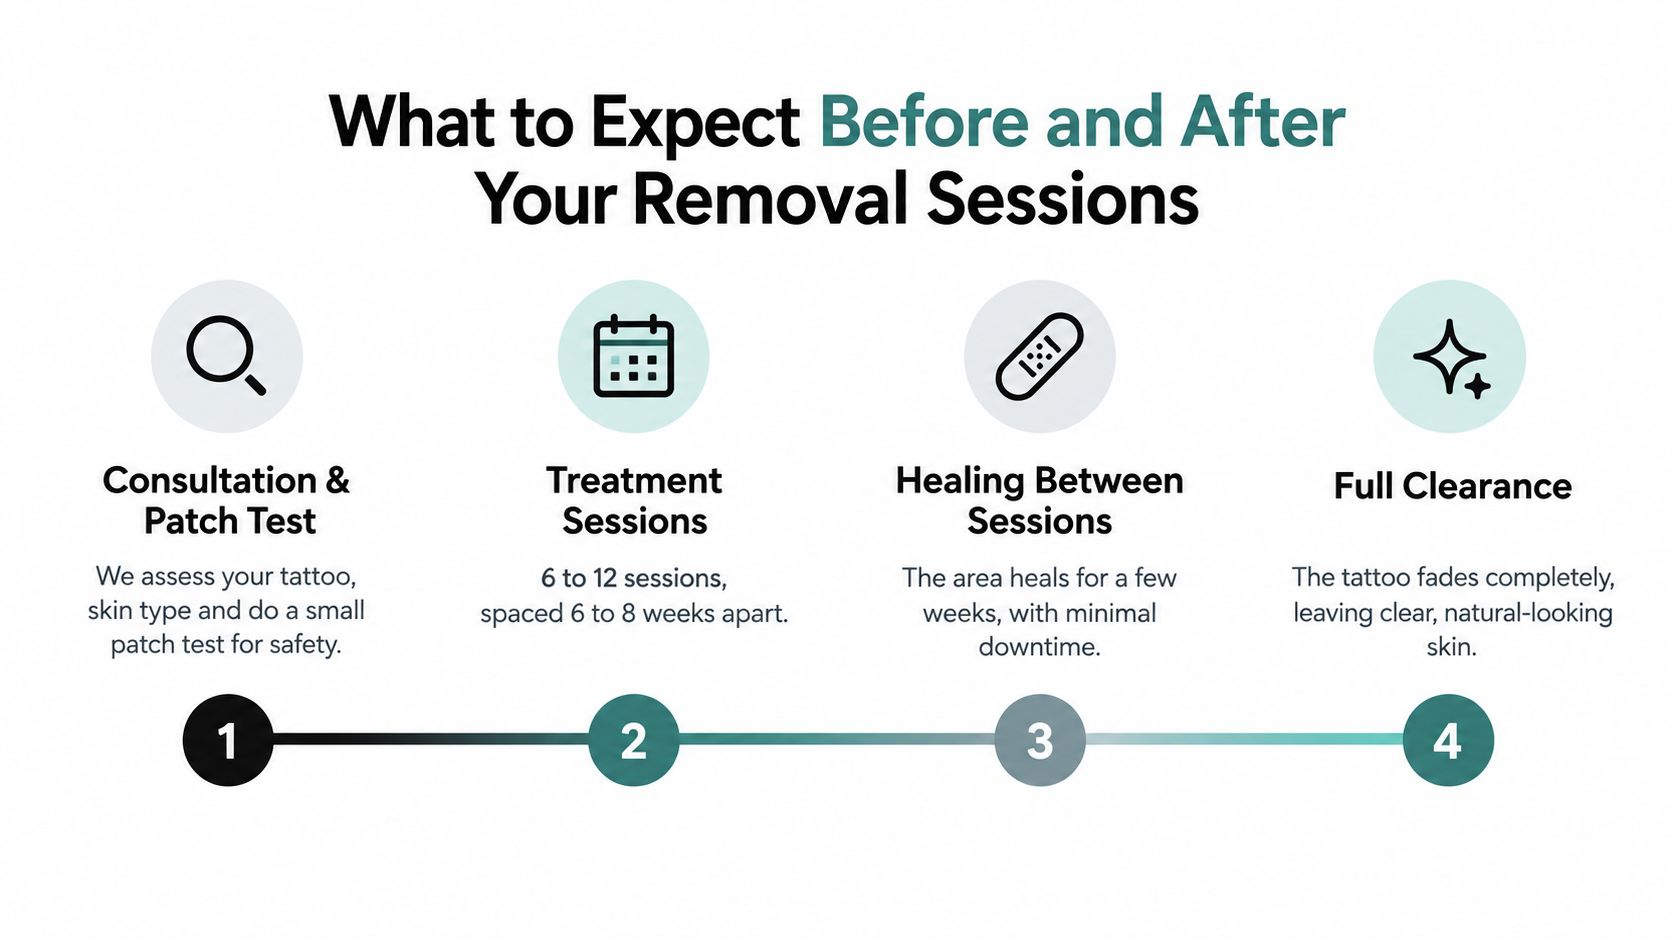
Tattoo removal is a gradual process. Most tattoos need 6 to 12 treatments, usually spaced 6 to 8 weeks apart, although the appropriate plan depends on the tattoo, ink density, color, location, skin tone, and how the skin responds. Each appointment starts another healing cycle rather than producing instant clearance.
During treatment, the tattoo may briefly look white or frosted. Redness and swelling can develop within hours, and blistering may occur during the first 48 hours. Over the following one to two weeks, the area may crust, scab, peel, itch, or feel tender. Subtle fading often becomes easier to see around weeks four through six, as the body continues clearing fragmented ink between sessions. A clinical review of 157 people found local reactions in 97% of participants, including blistering, edema, crusting, erythema, and pain. The clinical review of laser tattoo removal reactions supports a realistic expectation that visible skin reactions are common, not automatically a sign that something has gone wrong.
Think in healing stages
- Immediately after treatment: Keep the area protected and cool. Whitening, warmth, redness, swelling, and tenderness can occur.
- The first two days: Watch for blistering, pinpoint bleeding, and increasing sensitivity. Avoid heat, friction, sweat, and water exposure that submerges the skin.
- The first two weeks: Let crusts and flakes detach naturally. Clean gently, moisturize as directed, and keep the site protected from sunlight.
- Weeks four through six: Look for gradual pigment lifting, but also monitor for lightened or darkened patches that may appear after the surface seems healed.
The immune system needs time to clear ink fragments, so rushing sessions or judging the result immediately can lead to unrealistic expectations. For a broader appointment-preparation overview, this preparation guide for patients can help you organize questions before treatment.
Preparing Your Skin in the Weeks Before Treatment
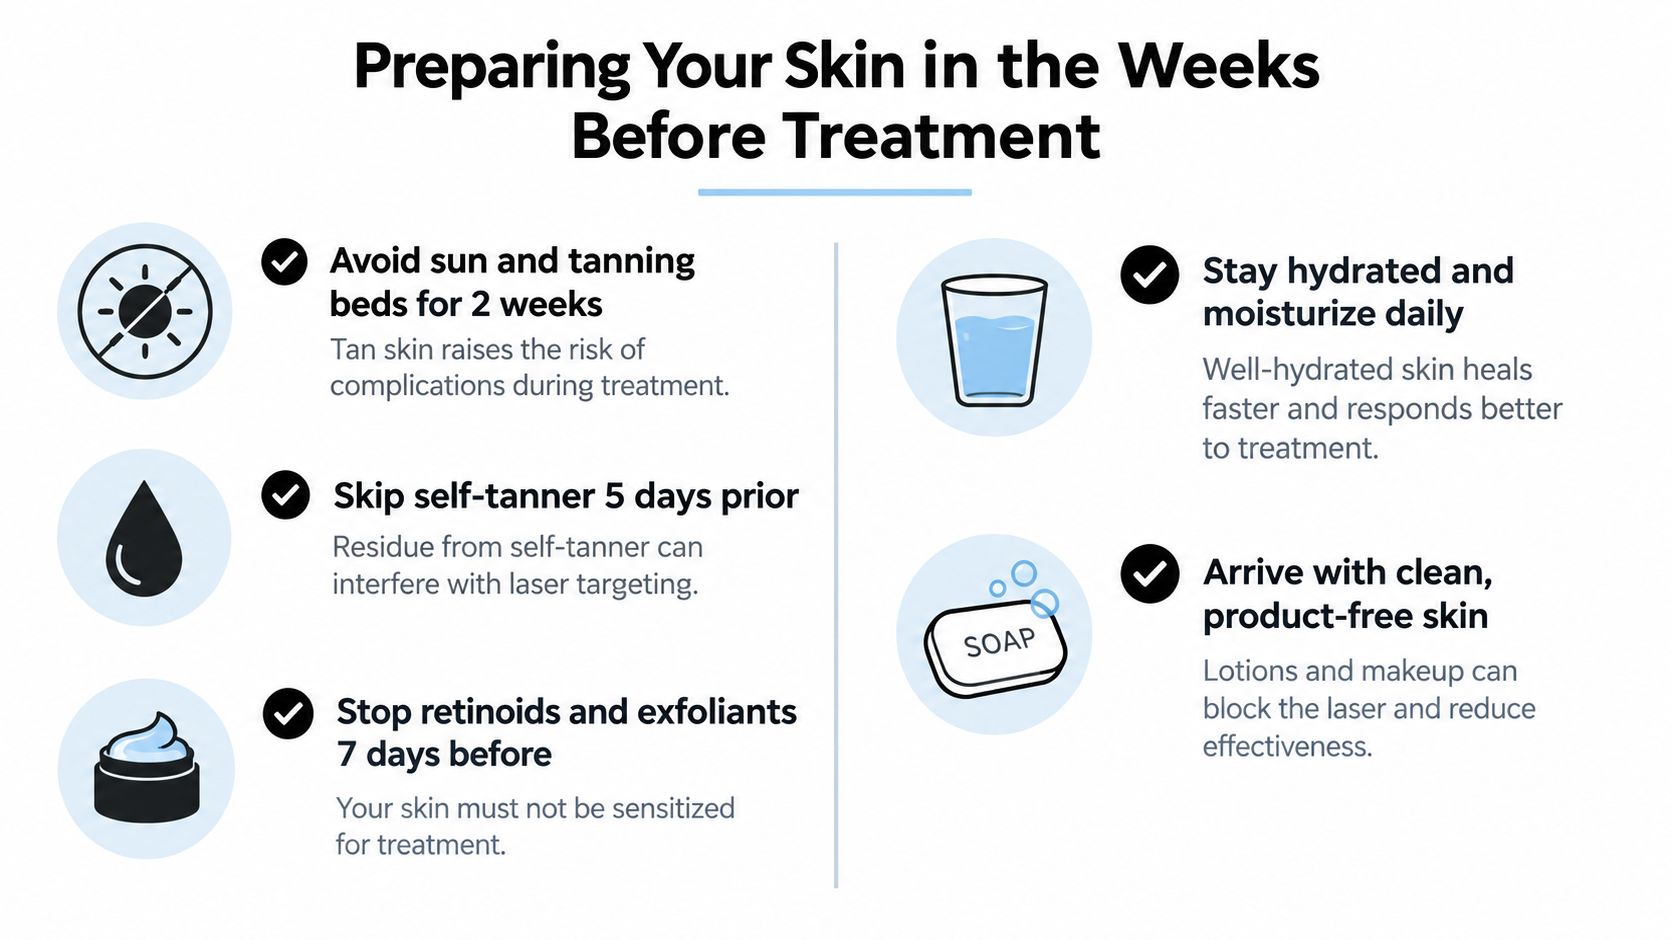
Good aftercare begins before the laser touches your skin. In the two weeks before treatment, keep the tattooed area out of direct sun and avoid tanning beds. Tanned skin contains more active pigment, which can make it harder to distinguish tattoo ink from surrounding skin and can increase the risk of burns, blistering, and post-inflammatory hyperpigmentation.
Stop using self-tanner 5 days before treatment. Residue can interfere with consistent laser targeting, even when the color looks faint. On the treatment zone, pause retinoids, glycolic acid, and other exfoliating acids 7 days before the appointment so the skin barrier isn't already sensitized.
Reduce avoidable irritation
Use a fragrance-free moisturizer daily, particularly if the area is dry or rough. Healthy, comfortable skin gives your clinician a better starting point than skin that is peeling from aggressive skincare.
Avoid waxing before treatment, and don't shave in a way that leaves cuts, razor burn, or visible irritation. If hair removal is necessary, ask the clinic which method and timing are appropriate for your treatment area.
Review medications carefully
Some clients are advised to stop blood-thinning supplements or anti-inflammatory medicines such as ibuprofen and aspirin 48 hours before treatment to reduce bruising. Don't change a prescribed medicine without confirming the decision with the physician who prescribed it. Supplements and medications can affect bleeding, healing, or how your skin reacts, so provide a complete list during consultation.
Arrive with clean, product-free skin. Leave lotions, makeup, oils, and deodorant off the treatment zone unless your clinician has specifically told you otherwise. You can review additional practical preparation details in this laser tattoo removal preparation guide, then follow the instructions given by your own provider if they differ.
The First 48 Hours After a Removal Session
The first two days require the most discipline because the treated skin is vulnerable to friction, heat, contamination, and ultraviolet exposure. Your clinician's dressing instructions take priority, particularly if the protective film used at your appointment differs from standard gauze.
Start with protection
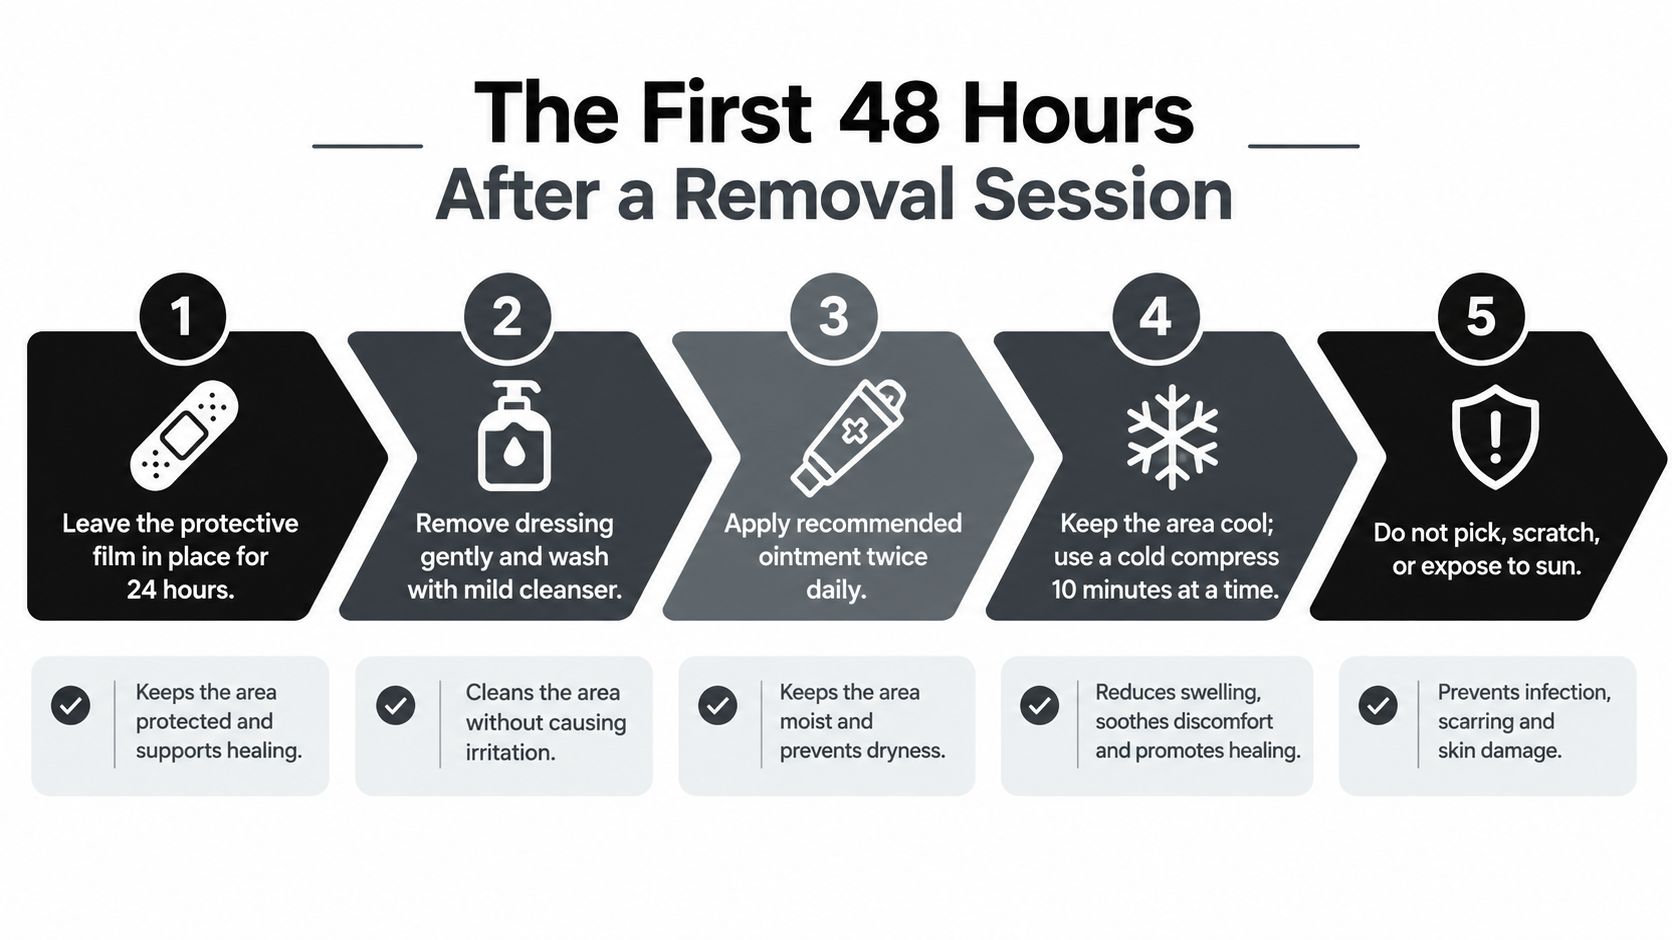
Leave the protective film or dressing in place for the timeframe your clinician specifies, often 2 to 6 hours. One supplied aftercare infographic may state 24 hours, but dressing materials and treatment responses vary, so don't remove a film early or leave it on longer without guidance.
After removal, wash your hands first. Clean the area with lukewarm water and a mild, fragrance-free soap, using light contact rather than a washcloth or exfoliating tool. Rinse thoroughly and pat dry with a clean towel or paper towel. Do this gently, typically twice daily, and whenever the dressing becomes wet or dirty.
Apply a thin layer of clinician-approved healing ointment. Suitable options may include petrolatum, Aquaphor, or another product your provider recommends. Cover the site loosely with a non-stick gauze pad secured with paper tape if clothing could rub against it. The dressing should reduce friction, not compress the skin or trap excessive moisture.
Know what normal reactions look like
Frosting is the temporary whitening that can appear during or directly after the laser pulse. Pinpoint bleeding, redness, edema, tenderness, itching, and small fluid-filled blisters can also occur. These reactions generally settle from within 24 hours to one or two weeks, depending on the response and the treated area. Clinical wound-care guidance for laser tattoo removal describes blistering, crusting, pinpoint bleeding, swelling, redness, and itching as expected early reactions.
Don't pop or scratch small blisters. They often resolve without intervention. A large blister may sometimes be drained for comfort, but that should be handled by a qualified clinician or according to explicit medical instructions. Picking scabs or breaking blisters yourself can increase infection and scarring risk, as explained in this tattoo removal aftercare guidance.
Use a cool compress for comfort, with a clean cloth between the cold source and your skin. Over-the-counter pain relief may be appropriate when used as directed and when it's safe for your health history. Avoid hot showers, baths, pools, hot tubs, saunas, direct sun, tight clothing, strenuous exercise, and active skincare ingredients. If itching is distracting, ask your clinician whether a plant-based anti-itch lotion is suitable. Don't apply an unfamiliar product to blistered or open skin without approval.
Caring for Your Skin During the Two-Week Healing Window
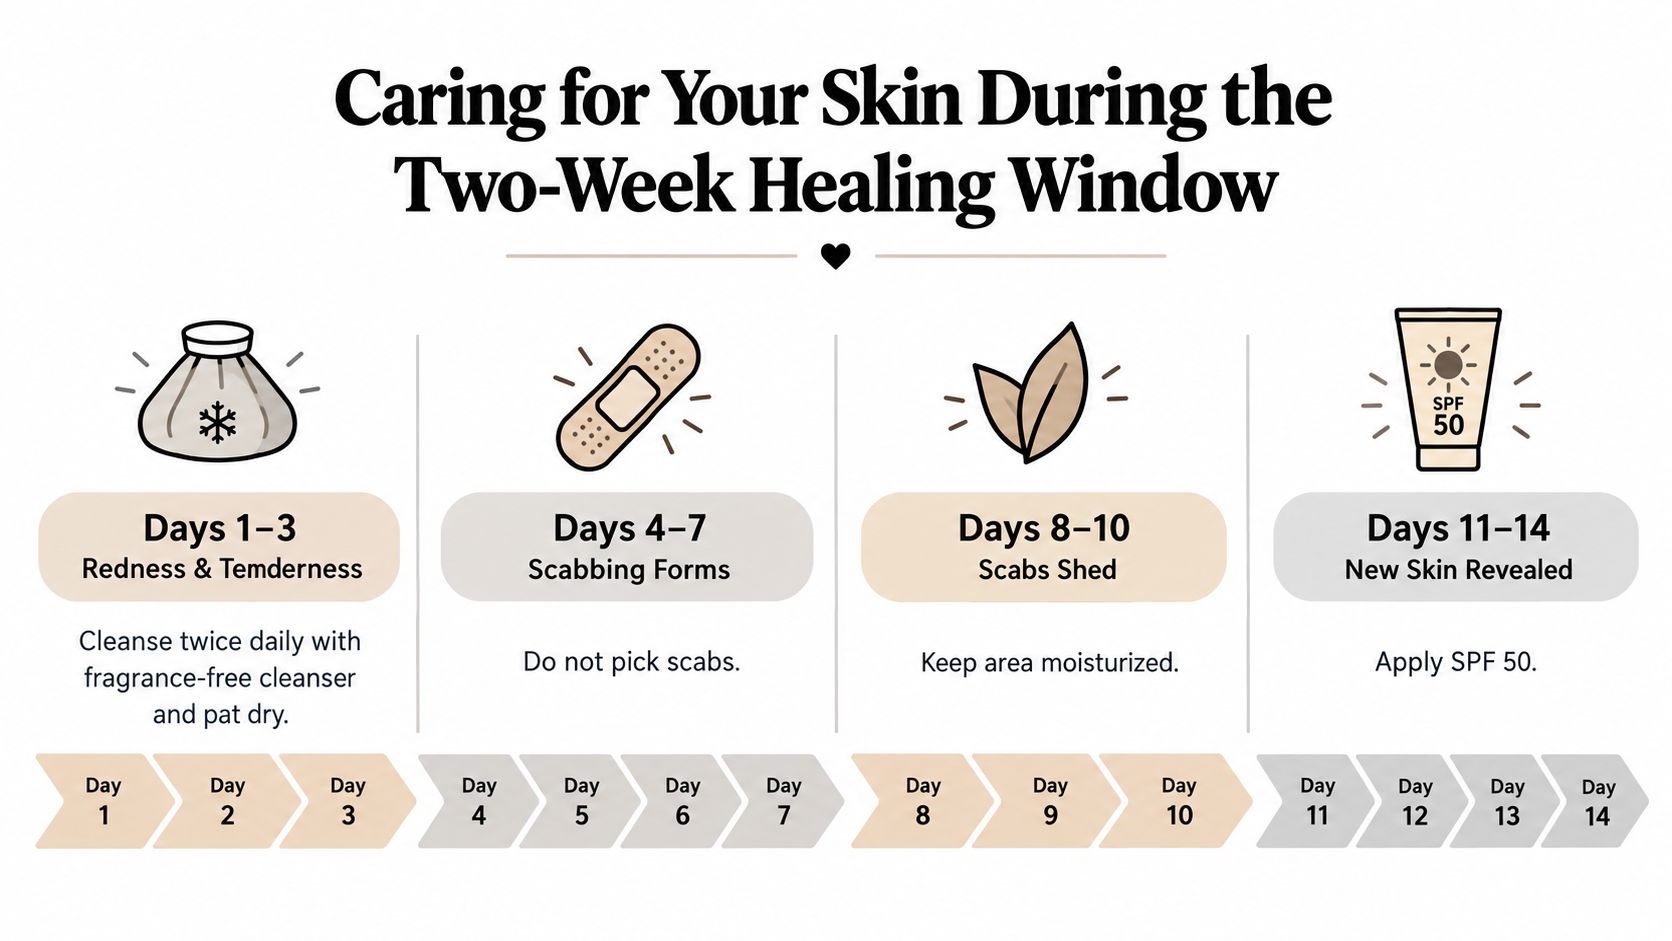
Healing continues after the initial tenderness fades. Treat the area like a small wound until the surface has closed and the crusting or peeling has finished. A gentle, fragrance-free cleanser used twice daily is usually sufficient. Pat the site dry with a clean paper towel rather than rubbing it with a bath towel.
For the first 3 to 5 days, use petroleum jelly or the prescribed occlusive layer as directed. Once peeling and scabbing begin, a bland, non-comedogenic moisturizer can be more comfortable, provided the skin is closed and your clinician approves the change. Too much ointment can leave the area damp and sticky, while too little can allow cracking. A thin layer is the useful middle ground.
Protect the healing surface
Don't submerge the treated area in a bath, swimming pool, hot tub, or sauna until it has healed. Choose cool showers instead. Submersion can increase contamination and infection risk, particularly when blisters, crusts, or small breaks in the skin remain. General laser tattoo removal aftercare guidance also recommends gentle cleansing and avoiding soaking while the site heals.
Light walking can usually resume immediately if it doesn't create heat, rubbing, or sweating at the site. Delay sweat-heavy workouts for 5 to 7 days, and cover the area with a loose, breathable bandage when activity resumes. Sweat trapped under tight clothing can irritate healing skin, while friction can lift crusts before the skin is ready.
Wear soft cotton and avoid waistbands, straps, seams, or rough fabrics that cross the tattoo. If the area is exposed outdoors, use physical cover-up clothing. Once the skin has healed enough for sunscreen, apply a broad-spectrum mineral SPF 30 or higher and reapply as directed. Medical guidance recommends minimizing sun exposure for about 2 weeks to reduce pigment changes. More detailed practical guidance is available in this post-laser tattoo removal care resource.
Itching, flaking, mild pinkness, and gradual improvement can fit normal healing. Increasing pain, redness that spreads, pus, fever, heat in the skin, an unpleasant odor, or significant drainage needs medical review. Cleveland Clinic's tattoo aftercare guidance lists spreading redness, red streaks, fever, worsening pain, heat, odor, and drainage among warning signs.
Delayed Pigment Changes Most Guides Miss
A tattoo can look healed on the surface while its color is still changing underneath. Four to six weeks after treatment, some people notice hypopigmentation, hyperpigmentation, or a faint ghost image. These delayed effects are often missed because basic aftercare advice focuses on redness, swelling, blisters, and scabs during the first few days.
Hypopigmentation is localized lightening where pigment was treated. Hyperpigmentation is a darker patch that develops after inflammation. A ghost image is a faint outline of the original tattoo that remains after much of the visible ink has faded. These changes may become more noticeable in darker skin tones or recently tanned skin, and they can last longer than the immediate irritation.
A medical review describes pigmentary alteration as the most common delayed complication of laser tattoo removal, including both lighter and darker changes. The review of delayed pigment changes after tattoo removal also highlights why sun protection matters after the surface appears normal.
Separate color change from texture change
Color variation without raised, indented, shiny, or increasingly painful texture is often monitored over time. Scarring, persistent thickening, worsening pain, or a change that continues to deteriorate deserves an in-person assessment. These pigment changes aren't usually harmful, but they can become persistent without careful protection.
Sunscreen and physical cover-up clothing are the most practical tools for limiting further pigment disruption. Don't try to correct a darkened patch with strong acids or bleaching products while the skin remains reactive. Once the area is fully healed, ask a qualified clinician whether a clinically proven hyperpigmentation treatment is appropriate for your skin and treatment history.
Adjusting Care for Full Removal, Fading, and Different Skin Tones
Aftercare has to match the purpose of treatment. Someone seeking complete clearance may need a more conservative schedule and longer recovery planning than someone softening a design for a cover-up. The laser settings, interval, and pigment-management strategy should be chosen after examining the tattoo and the skin in person.
For full removal, sessions may be spaced 8 to 12 weeks apart when additional immune clearance time and reduced cumulative skin trauma are priorities. Long-term sun avoidance remains important because pigment changes can make the treated area contrast with surrounding skin.
For cover-up preparation, 2 to 4 lighter-fluence sessions spaced 6 to 8 weeks apart may be used to soften lines rather than erase every fragment. Over-treating can damage the skin surface that a tattoo artist needs to work on. The right endpoint is often a lighter, more workable canvas, not complete visual clearance.
Match the protocol to skin tone
The Fitzpatrick scale provides a useful framework, but it isn't a substitute for examining your actual skin, tanning history, and reaction to previous treatments.
| Goal / Skin Type | Session Spacing | Sun Protection | Key Product Notes |
|---|---|---|---|
| Full removal, Fitzpatrick I to II | Standard intervals may be considered after healing assessment | Vigilant SPF use and physical cover-up | Use bland moisturizers and clinician-approved healing ointment |
| Full removal, Fitzpatrick III to IV | Lower fluences and longer intervals may reduce pigment risk | Strict protection before and after treatment | Azelaic acid or hydroquinone only under clinician guidance |
| Full removal, Fitzpatrick V to VI | Lowest settings and the most cautious schedule | Consistent physical protection and sunscreen after healing | Work with a technician experienced with melanin-rich skin; monitor for hypopigmentation and keloid risk |
| Cover-up fading, any skin type | Often lighter treatment with 6 to 8 weeks between sessions | Protect the canvas from UV while it heals | Avoid aggressive products that may irritate skin needed for new ink |
Types I and II often tolerate standard fluences with vigilant SPF use. Types III and IV may need lower fluences, longer intervals, and proactive pigment-suppressing products such as azelaic acid or hydroquinone, but only with clinician supervision. Types V and VI require especially cautious settings and a technician experienced with melanin-rich skin.
A patch test on three different sessions can't replace a full consultation. It provides useful information, but the clinician still needs to evaluate ink colors, tattoo depth, scarring history, tanning, medication use, and the possibility of keloid formation.
Your Final Aftercare Checklist and When to Call
Use this checklist as a practical reference, but follow your treating clinician's instructions when they differ because dressings, laser settings, and skin responses aren't identical.
Match each action to its purpose
- Prepare the skin before treatment: Avoid tanning, pause sensitizing products as directed, moisturize with a fragrance-free product, and arrive with clean skin. This gives the clinician a less irritated treatment surface.
- Protect the area on treatment day: Follow the dressing instructions and keep the site cool. Protection limits friction during the period when redness and swelling may develop.
- Clean gently during the first 48 hours: Use mild, fragrance-free soap and lukewarm water, then pat dry. Scrubbing can disturb fragile skin and crusting.
- Use a thin approved ointment layer: Petrolatum or another clinician-approved product helps prevent excessive dryness without requiring heavy application.
- Avoid heat, soaking, and strenuous exercise: This reduces irritation, sweat exposure, and contamination while the surface is vulnerable.
- Leave blisters and scabs alone: Picking, popping, or scratching increases the risk of infection and scarring.
- Wear loose clothing: Soft, breathable fabric prevents seams and waistbands from rubbing the treated site.
- Protect healed skin from UV exposure: Use physical cover-up clothing and broad-spectrum mineral SPF 30 or higher. Sun protection helps reduce unwanted pigment changes.
- Photograph the area consistently: Take pictures in similar lighting between sessions so your clinician can track fading and identify changes that aren't obvious from memory.
Call promptly when symptoms worsen
Contact a clinician or physician for spreading redness beyond the treated site, pus, fever, increasing pain after day three, hives, or a blister larger than a quarter. Skin that feels hot, red streaks moving away from the area, significant drainage, or an unpleasant odor also needs medical attention. The signs of infection after tattoo removal can help you organize concerns before calling, but don't delay care when symptoms are progressing.
Bring your photographs and a list of products or medications to each appointment. The next practical step is a consultation where the provider can assess the tattoo, discuss complete removal versus cover-up fading, review your skin's risk factors, and set an aftercare plan you can follow at home.
EradiTatt Tattoo Removal provides consultations and progressive tattoo removal plans for clients seeking complete clearance or fading for a cover-up, with aftercare guidance matched to the treated area and skin type. Visit EradiTatt Tattoo Removal to discuss your tattoo, healing concerns, and the next safe step.