
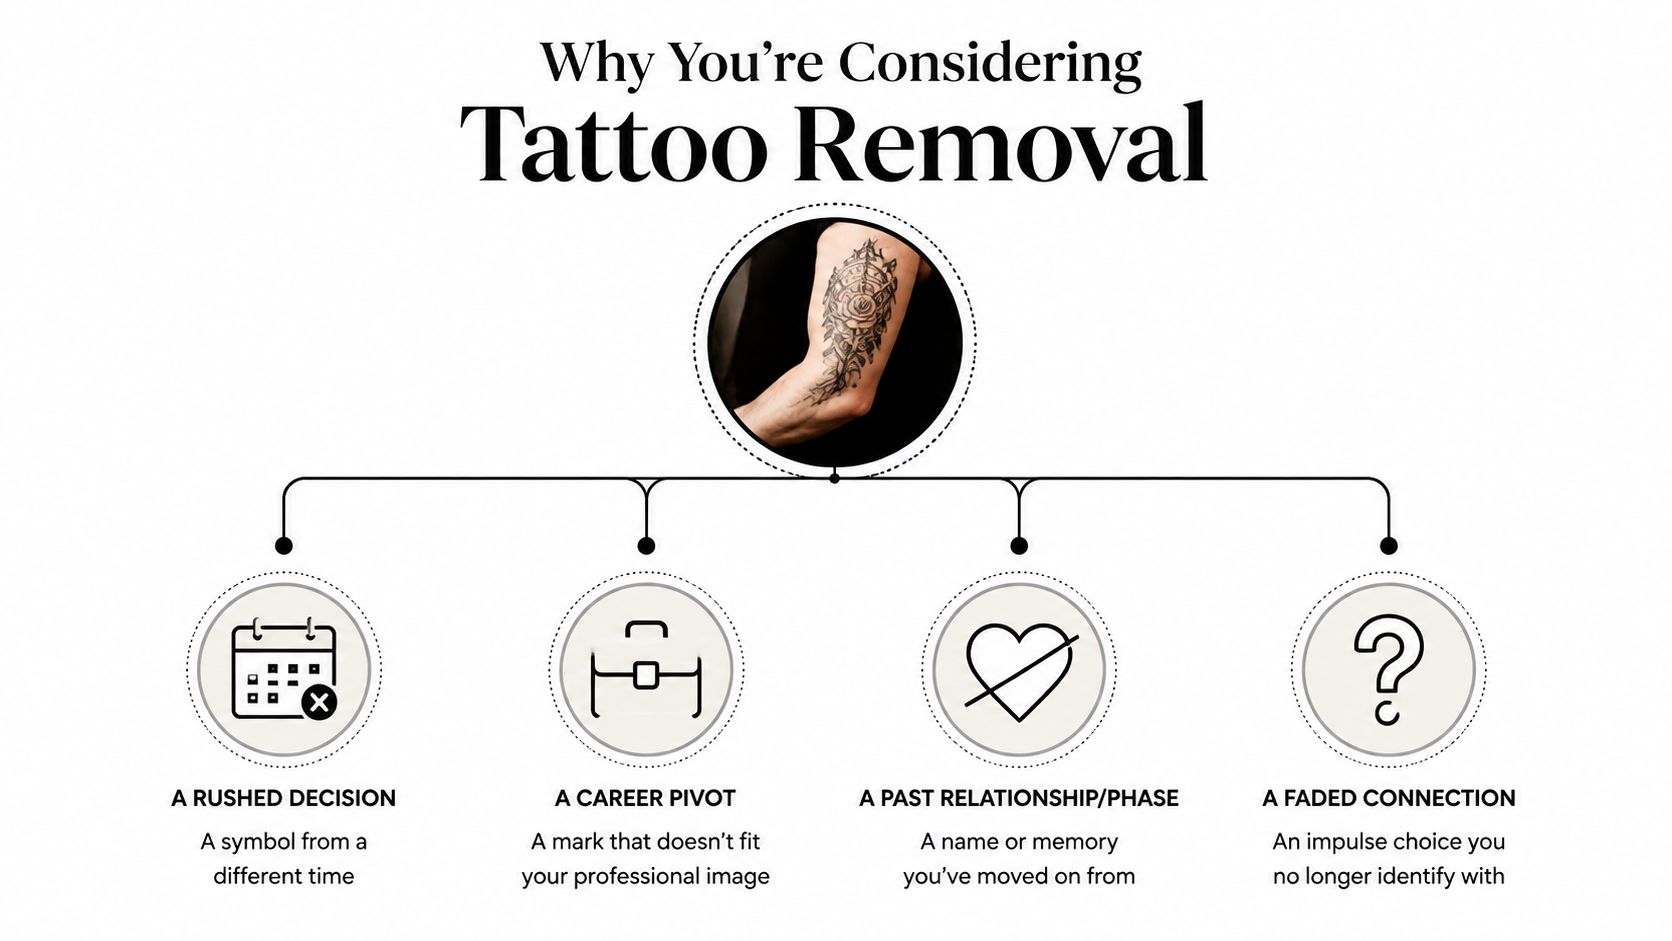
You're standing in front of the mirror, tracing the edge of a tattoo you no longer recognize. Maybe it's a name from a relationship that ended, a symbol from a rushed decision, or an old design that no longer fits your work or your sense of self. Before you book a laser appointment, there's one decision that matters most: do you want the tattoo gone completely, or faded enough to make room for a cover-up?
That choice changes your treatment plan, expected session count, scheduling, and even which practitioner you should consult. Complete removal demands patience and may leave a faint residual image, while strategic fading focuses on creating a workable canvas for a new design. Modern laser systems have made removal more controlled than older methods, but the process still depends on your ink, skin, tattoo history, and healing response.
Table of Contents
- Why You're Really Considering Tattoo Removal
- Comparing the Main Removal Methods
- Preparing for Your Consultation and First Session
- What Each Session Actually Feels Like
- How Many Sessions You'll Realistically Need
- Risks, Side Effects, and How Providers Reduce Them
- Fading Strategically for a Cover-Up Tattoo
Why You're Really Considering Tattoo Removal
People often wait years before seeking treatment. They're worried about pain, scarring, expense, or the commitment involved. Some hope the tattoo will fade by itself. Others have already tried creams or home remedies and are disappointed that the ink remains unchanged.
The first consultation should begin with your goal, not with a sales pitch. Tell the practitioner whether you want complete clearance, selective removal of one element, or enough fading for a new tattoo artist to work over the existing design.
What the laser is actually doing
Tattoo needles place pigment beneath the epidermis, in the dermis. Laser energy reaches that pigment through the skin and delivers an extremely short pulse that the ink absorbs more readily than the surrounding tissue. Common treatment choices include 1064 nm for dark inks and 532 nm for reds and oranges. Platforms such as PiQo4 use multiple wavelengths and both nano- and picosecond pulse durations to address a broader range of pigments.
The laser doesn't pull ink out in one pass. It fractures larger pigment particles into smaller fragments. Your immune system, particularly macrophages, then gradually transports those fragments away over the following weeks. That biological clearance is why a tattoo often looks much the same immediately after treatment, then becomes lighter during the healing interval.
Practical rule: A laser session starts the fading process. Your body completes much of the work afterward.
Treatments must be spaced far enough apart for the skin to recover and for the immune system to clear disrupted pigment. Clinical guidance supports waiting at least a month between Nd:YAG treatments for wound healing and optimal ink removal, while many clinics use intervals of six to eight weeks depending on the tattoo and skin response. Treating too soon can add irritation without giving the body time to remove the fragments, and repeated treatments at insufficient intervals may contribute to fibrosis and visible texture changes. See the evidence on session spacing and healing after Nd:YAG treatment.
Complete removal versus a cover-up
Complete removal is the longer path. A review of tattoo-removal evidence found that Nd:YAG treatments commonly require 4 to 8 sessions to reach at least 75% clearance, particularly for black and blue ink, while professional tattoos can require substantially more treatment than amateur work. A separate evidence review describes standard ranges of 5 to 10 sessions for amateur tattoos and 15 to 20 sessions for professional tattoos, with rare cases reaching 25 sessions. The determining factors include pigment color, density, depth, age, location, layering, and the total amount of ink present. Those ranges are discussed in this peer-reviewed review of tattoo-removal outcomes.
Cover-up fading is a different objective. You don't need every particle removed. You need the old design light enough that the new tattoo can control the visual result. That can mean fewer visits, but your cover-up artist should define the target before laser treatment begins.
Comparing the Main Removal Methods
Laser treatment is the usual choice because it targets pigment without deliberately removing the surrounding layers of skin. The alternatives can work in narrowly defined situations, but each carries a significant trade-off.
| Method | Best For | Sessions | Scarring Risk | Color Range |
|---|---|---|---|---|
| Laser | Most tattoo sizes and colors | Multiple staged treatments | Lower when properly performed | Broad, with wavelength changes |
| Surgical excision | Small tattoos where one procedure matters most | One procedure | Linear scar is expected | Any pigment within the removed skin |
| Dermabrasion | Rare specialist situations | Multiple treatments may be needed | Higher | Variable and often uneven |
| Chemical peels | Limited superficial pigment concerns | Multiple treatments may be needed | Meaningful irritation and scarring risk | Poor penetration into dermal ink |
| Removal creams | No reliable role for dermal tattoos | No dependable treatment course | Skin irritation or injury is possible | Ineffective for ink in the dermis |
Surgical excision cuts out the tattooed skin and closes the edges with sutures. It can remove a small tattoo in one visit, but it leaves a linear scar and isn't practical for larger designs.
Dermabrasion sands the skin toward the dermis. Because tattoo ink sits in the dermis, this approach can create bleeding, uneven texture, and scarring rather than controlled pigment clearance. Chemical peels face a similar limitation because they primarily affect superficial skin.
Tattoo creams don't reach dermal pigment reliably. Abrading the epidermis may cause inflammation while leaving the tattoo intact. Laser offers the most balanced combination of pigment targeting, color flexibility, downtime, and scar control, provided the device and settings match the tattoo and skin.
Preparing for Your Consultation and First Session
Start preparation before the appointment, not the morning you arrive. Untanned, intact skin gives the practitioner a safer baseline and makes it easier to distinguish the tattoo from temporary irritation or pigment changes.
Build a useful consultation file
Bring a photograph of the original tattoo if the design has already faded, along with a complete list of medications and supplements. Tell the provider about previous laser treatment, scarring, keloids, skin conditions, isotretinoin use, and any current infection or irritation in the treatment area.
Ask direct questions:
- Device: Will the practitioner use a PiQo4, PicoSure, Q-switched Nd:YAG, or another medical-grade platform?
- Skin assessment: How will they determine your Fitzpatrick skin type and adjust energy for your complexion?
- Patch testing: Can they test a small area first, particularly if you have a darker complexion or unusual ink?
- Relevant experience: Have they treated tattoos with your specific colors, density, age, and body location?
- Planning: What session range, healing interval, downtime, and pricing structure do they expect?
Providers may use skin analysis or a Woods lamp, photograph the tattoo under consistent lighting, and record its size, color mix, density, and texture. You should leave with written aftercare instructions and a plan that distinguishes complete removal from cover-up fading. For additional preparation guidance, review how to prepare for tattoo removal.
The days before treatment
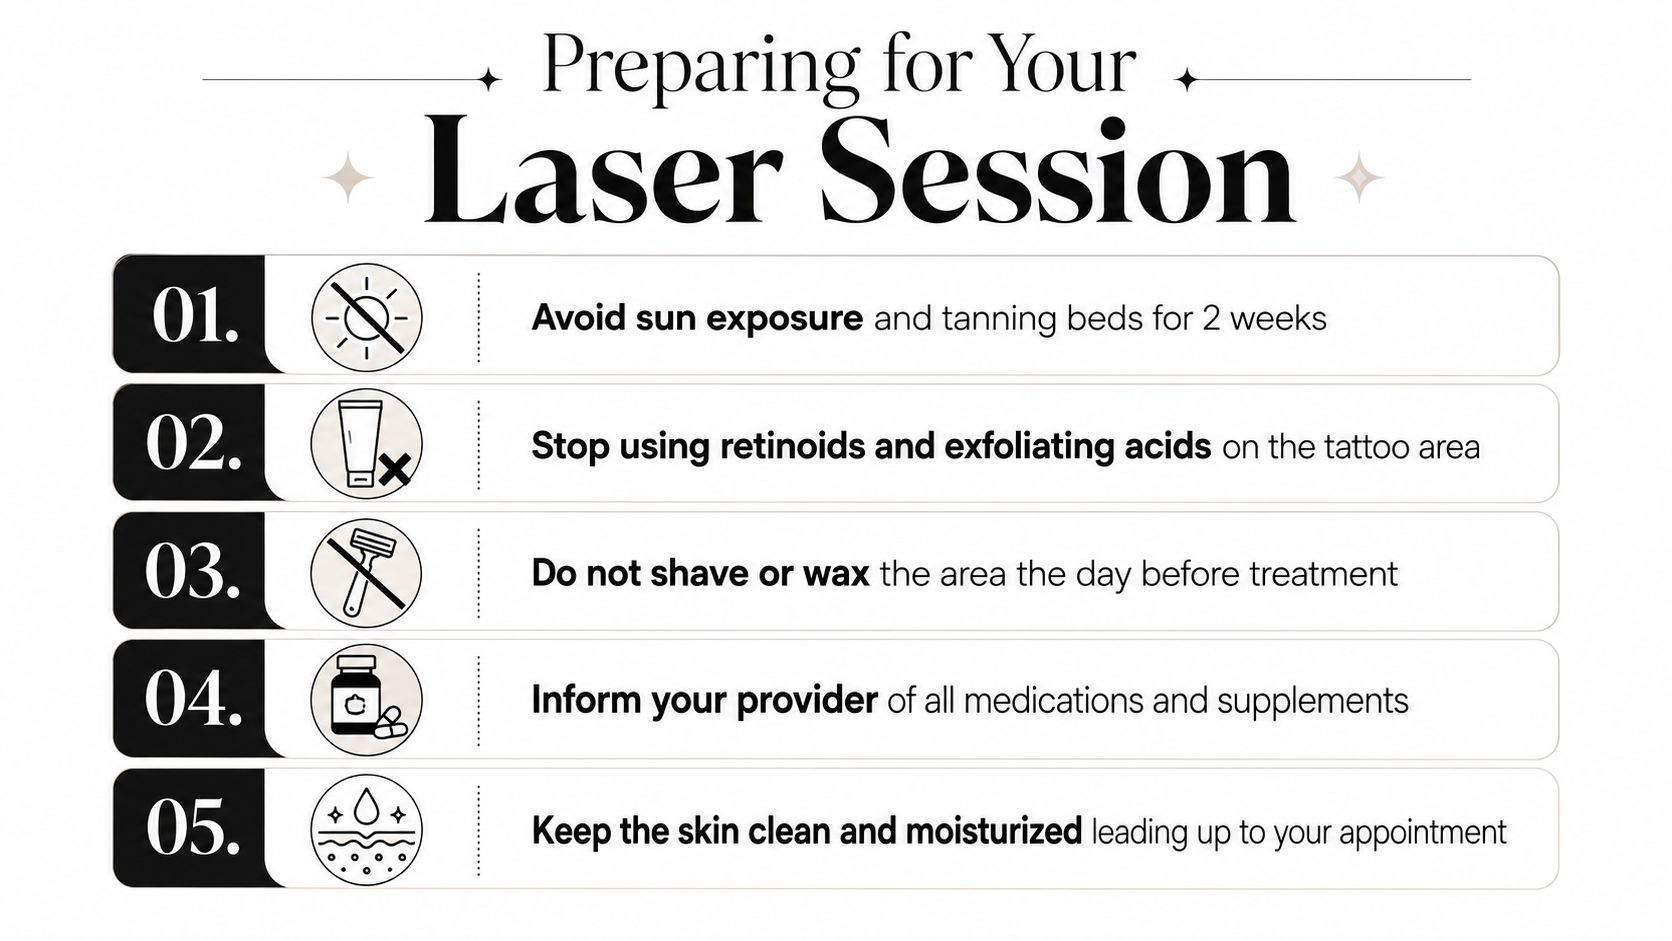
Avoid sun exposure and tanning beds for two weeks, and stop retinoids and exfoliating acids on the tattooed area. Don't stop prescription medication without medical clearance, but make sure your practitioner knows about photosensitizing medicines such as doxycycline or isotretinoin.
On treatment day, arrive with clean skin and no lotion over the tattoo. Eat beforehand, avoid shaving or waxing the day before, and arrange transportation if a large area is being treated or you expect discomfort.
What Each Session Actually Feels Like
A typical visit starts with baseline photographs, skin inspection, and cleansing. You'll receive protective eyewear before the practitioner positions the handpiece over the tattoo. The laser then treats the pigment in small sections, with the practitioner adjusting settings according to color, density, skin type, and the response of the skin.
The sensation is commonly described as a quick elastic-band snap. Nanosecond pulses can feel like repeated sharp snaps, while picosecond devices often feel like a faster, more concentrated zap. Discomfort varies by location and ink density, but many patients describe it qualitatively as brief and tolerable rather than continuous pain.
Clinics may use a cold-air blower such as a Zimmer system, a chilled contact tip, or topical numbing cream applied before treatment. Sensitive areas, dense black sections, and bony locations usually feel more intense than a lightly inked area with softer shading.
The first 72 hours
Within seconds, treated ink may develop a temporary white frosting effect. This comes from rapid energy absorption and gas bubbles around the pigment. Dense areas can show pinpoint bleeding, redness, tenderness, and swelling.
The skin may swell during the first day. Blisters can appear on heavily saturated black ink by the second day, and the area may begin to scab or feel tight by the third. These reactions aren't permission to pick, scrub, or drain the skin yourself.
Use cool compresses during the first 24 hours and apply plain petroleum jelly or the ointment your provider prescribed. Cover the area with a non-stick dressing and change it twice daily. Don't soak the treatment site, swim, or scrub it while it heals. Once the skin has closed, protect it with SPF 30 or higher and follow your clinic's specific instructions. The FDA's tattoo-removal guidance also identifies pain, redness, soreness, pinpoint bleeding, infection, scarring, and temporary lightening as possible risks.
How Many Sessions You'll Realistically Need
A small tattoo is not automatically a quick removal. Ink density, color, depth, age, placement, previous treatment, and skin tone all affect the estimate. A light amateur mark may need far less work than a saturated professional cover-up.
Clinical analysis found averages of 3.2 sessions for low-density tattoos and 9.0 sessions for high-density tattoos, with an overall mean of 6 sessions across a range of 2 to 20 sessions. Use those figures as planning context, not a promise for an individual tattoo. The clinical analysis of tattoo characteristics and treatment counts explains why tattoo characteristics change treatment counts.
| Tattoo Type | Typical Sessions | Treatment Duration | Notes |
|---|---|---|---|
| Amateur tattoo | 5 to 10 | Staged over healing intervals | Shallow or uneven pigment may respond more readily |
| Professional tattoo | 15 to 20 | Long-term staged treatment | Dense, deep pigment usually requires more work |
| Black or blue pigment | 4 to 8 for at least 75% clearance in many Nd:YAG studies | Multiple healing cycles | Often responds better than lighter colors |
| Picosecond-treated tattoo | 1 to 10 in reported trials for over 70% clearance | Depends on response | Outcomes vary with color and tattoo characteristics |
These ranges reflect published treatment outcomes. The U.S. FDA advises that removal commonly takes 6 to 10 treatments and notes that yellow, green, and red are generally harder to remove than dark blue and black. Read the FDA information on tattoos and permanent makeup for its overview of tattoo-removal expectations.
Your goal changes the estimate. Complete removal usually demands more sessions than fading a design enough for a cover-up. For a cover-up, the practitioner may stop once the old pigment is sufficiently broken up and the skin has recovered, rather than continuing toward maximum clearance.
Healing intervals also control the calendar. Older tattoos may have lightened through natural immune activity, but age does not offset heavy saturation or difficult pigment. Fingers, feet, and ankles can progress differently from areas with stronger circulation. Your practitioner should assess the actual tattoo and set review points after each healing cycle. The guide to how many laser tattoo removal sessions may be needed offers further planning context.
Risks, Side Effects, and How Providers Reduce Them
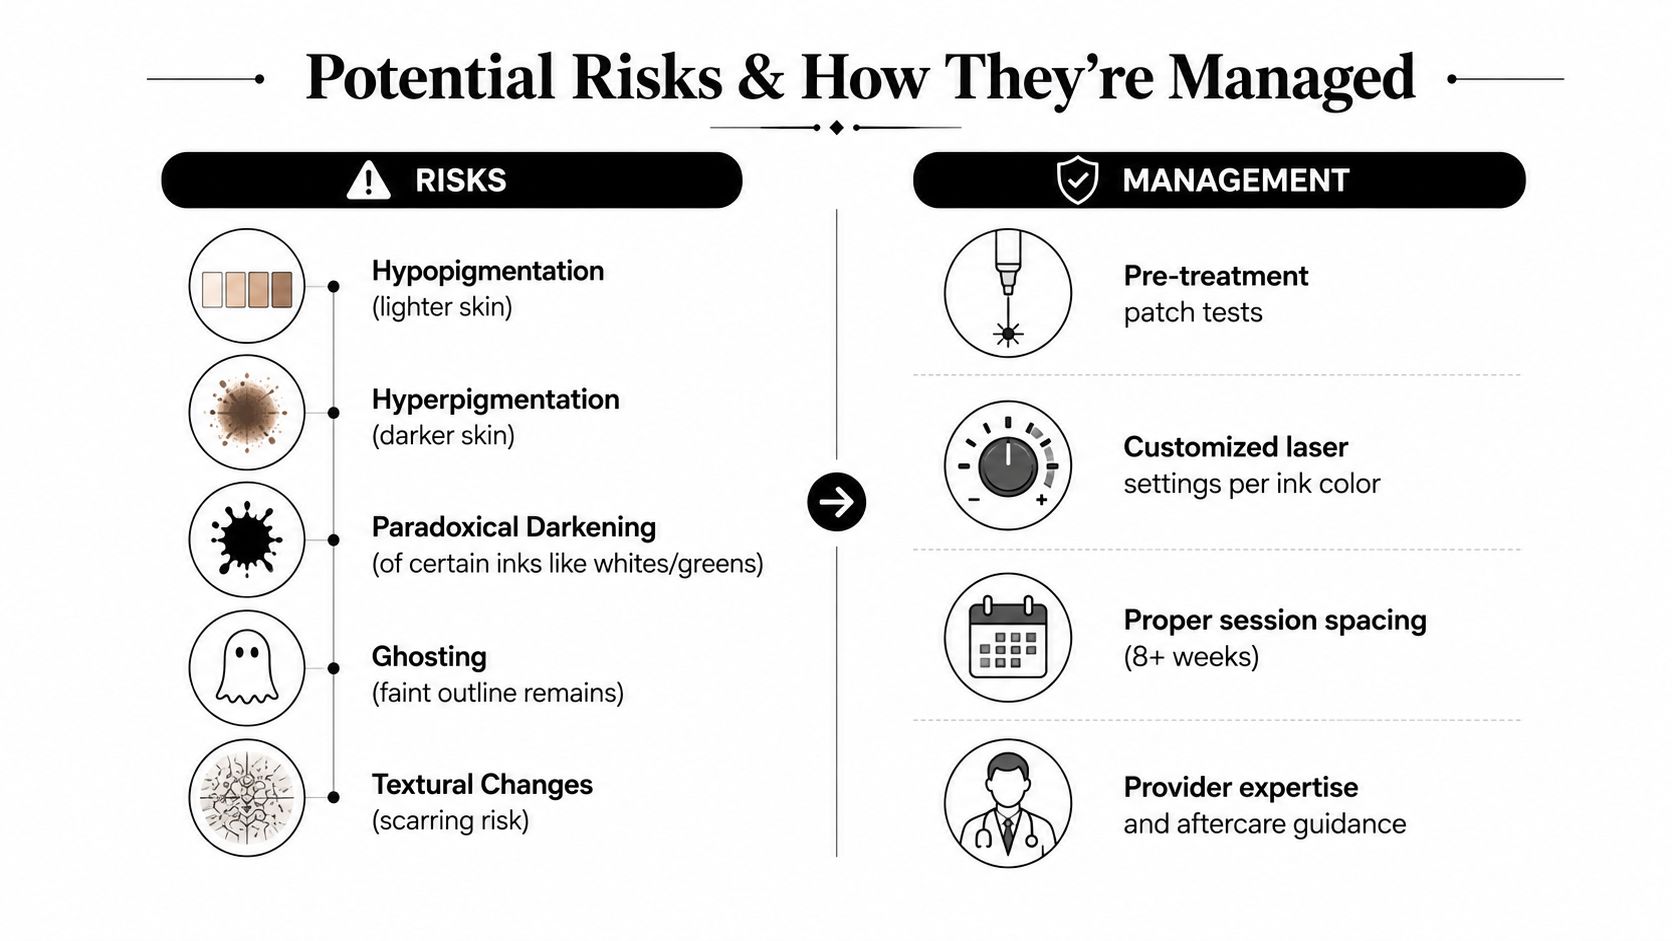
Laser tattoo removal carries real risks, and pigment change deserves clear discussion before treatment. Practitioner-reported data estimate complications in 8.1% of laser tattoo-removal sessions, most commonly edema at 3.0%, blistering at 1.9%, and hematoma at 0.7%. Pigmentary changes occurred in about 0.6% of treatments, while hypertrophic scarring and paradoxical darkening occurred in 0.2%. Keloids, allergy, ink blow-out, and infection were each about 0.1%. These figures come from recent practitioner data on laser tattoo-removal complications.
Hypopigmentation leaves treated skin lighter. Hyperpigmentation makes it darker, temporarily or persistently. Certain pigments can darken after laser exposure, and a faint residual outline, known as ghosting, may remain after substantial fading. Original tattoo texture can also become more noticeable as the ink clears. Those possibilities matter whether the goal is complete removal or enough fading for a cover-up.
What safer treatment looks like
A careful provider asks about keloid history, isotretinoin use, active infection, previous treatment, tanning, and unusual reactions. Depending on the case, they may patch-test a small area, cool the skin, start with conservative energy, and adjust pulse duration, spot size, or wavelength as the tattoo responds.
Darker skin contains more melanin, which can absorb competing laser energy. Practitioners may therefore use lower energy and allow longer healing intervals to reduce hypopigmentation risk. The calendar may extend, but treating again before the skin has recovered can increase harm without improving the result.
Red flags include an untrained operator, aggressive overlapping passes, no discussion of Fitzpatrick skin type, no appropriate patch test, or aftercare that tells patients to pick blisters or scabs. Review these laser tattoo-removal risks and precautions before your consultation.
Fading Strategically for a Cover-Up Tattoo
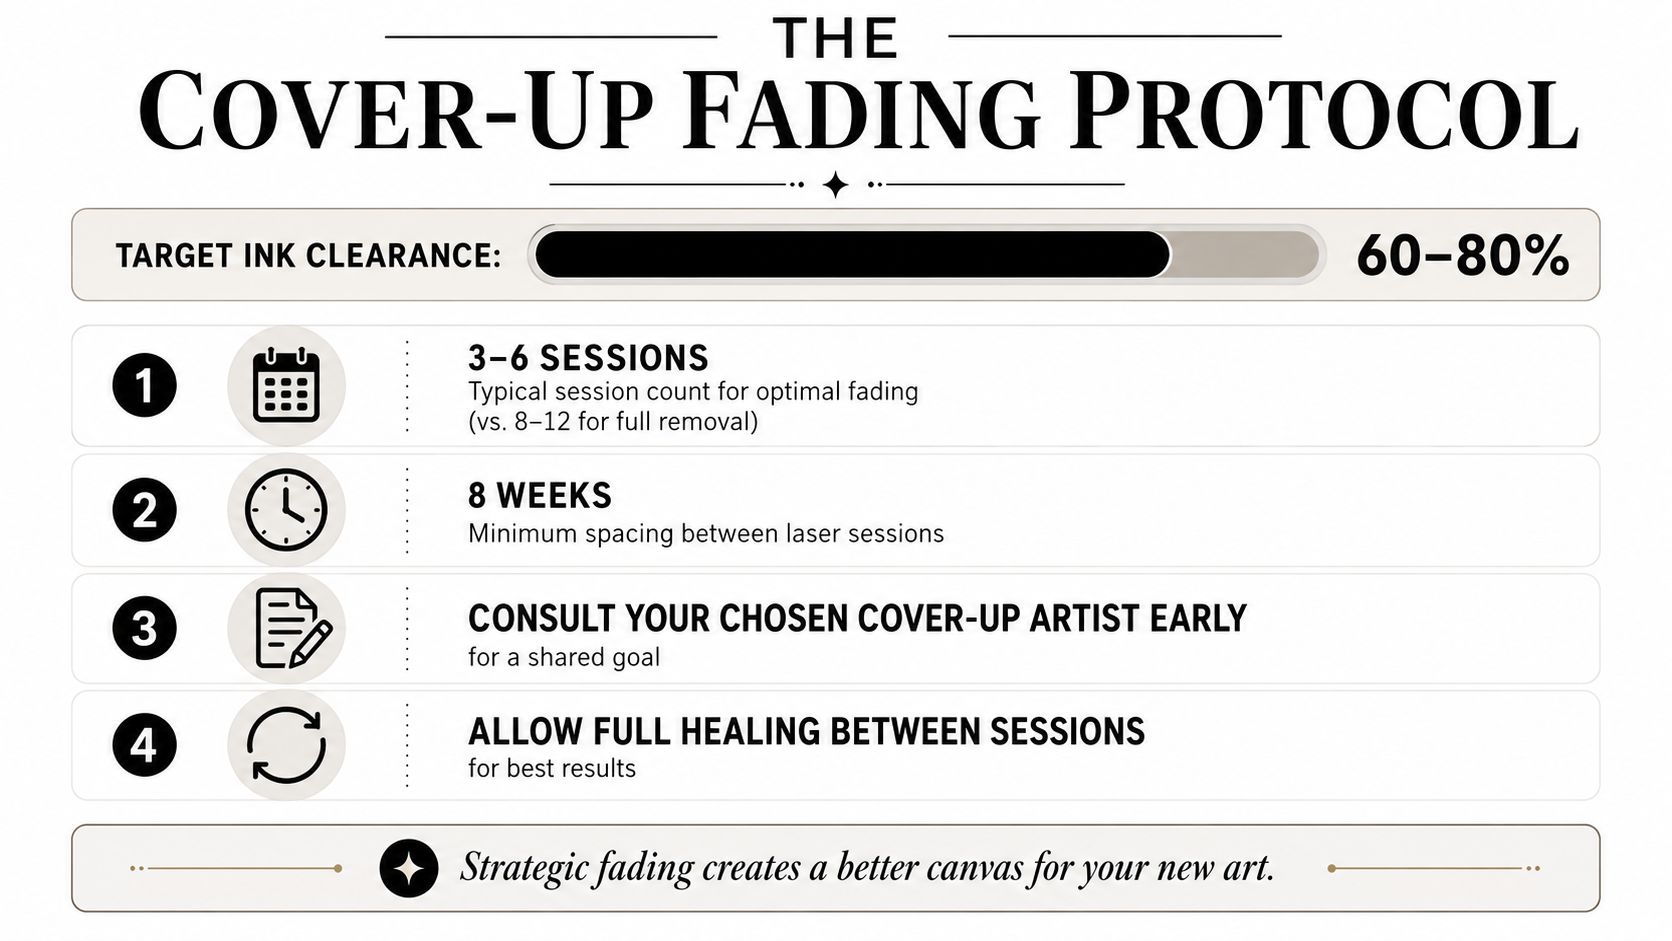
A cover-up doesn't require the same endpoint as complete removal. The goal is to reduce the old tattoo's visual dominance so the new artist can control the composition, contrast, and color. Many cover-up plans target 60% to 80% ink clearance, often using 3 to 6 sessions spaced about 8 weeks apart, rather than the longer course that complete removal may require. The figures and treatment sequence are summarized in the cover-up fading protocol.
Coordinate before the first laser session
Choose the cover-up artist before you start fading. Ask that artist to inspect the existing tattoo and describe the target lightness, acceptable residual pigment, preferred design direction, and colors they expect to use. A tattooer who understands the old ink can tell the laser practitioner which areas need the most reduction and which residual marks the new design can conceal.
Design choice matters. A large, dark, highly shaded cover-up may hide a faded tattoo more easily than a delicate design with open skin and pale colors. Green, teal, sky blue, yellow, and some mixed pigments can be more stubborn, so the artist shouldn't promise that every old line will disappear after a short course.
Be cautious if an artist says the tattoo will be “easy to cover” without examining its density, depth, and color. Ask whether they expect the old outline to show through, whether the new design must be larger, and whether laser fading would give them more control. A clear answer protects you from paying for a new tattoo that later needs correction.
Turn the plan into appointments
A practical sequence looks like this:
- Select the clinic. Look for medical-grade equipment such as a Q-switched Nd:YAG or picosecond platform, and ask to see healed results involving your skin tone and ink colors.
- Complete the consultation. Request a test patch when appropriate, a written session range, an explanation of expected downtime, and transparent package or per-visit pricing.
- Schedule staged treatments. Follow the interval your provider sets rather than trying to accelerate fading. The skin and immune system need time to respond.
- Return to the tattoo artist. A cover-up is commonly scheduled 4 to 8 weeks after the final laser session, once the skin has healed and the artist can evaluate the remaining pigment.
- Protect the result. Avoid sun exposure before treatment, keep active acids away from the area, arrive with clean skin, and follow all wound-care instructions after each visit.
A full-removal plan may average 10 to 14 months, while strategic cover-up fading may take 6 to 8 months, depending on the tattoo and the healing schedule. These are planning horizons, not guarantees. Your skin tone, pigment mixture, ink density, previous cover-ups, and response to treatment may shorten or extend them.
The fastest safe route is usually the one that respects healing, not the one with the shortest gap between appointments.
Removal works better as a project with milestones than as a single appointment. Decide your endpoint, coordinate with the right artist if a cover-up is involved, document the tattoo at baseline, and choose a provider willing to explain both progress and limitations.
EradiTatt Tattoo Removal offers laser tattoo removal for complete clearance or cover-up fading through clinics in Tampa, Orlando, St. Petersburg, Palm Harbor, and Bradenton/Sarasota, with treatment plans designed for skin type, tattoo size, color, and lifestyle goals. Visit EradiTatt Tattoo Removal to request a consultation and discuss the safest next step for your tattoo.